
Ship and receive
Shipping and receiving keeps track of stock going in and out of the shop:
- Purchase orders (PO-1001, PO-1002, …) are what you’ve ordered from a vendor. When you receive one, the items go into stock.
- Delivery orders (DO-1001, DO-1002, …) are what goes out to a customer. When you ship one, the items leave stock.
Both kinds count in the forecast while they’re open. A purchase order is stock on its way in, and a delivery order is stock that’s already promised. You can receive or ship an order all at once or in parts. Admins and managers can use these pages. Open them from Stock → Shipping and receiving. The page has tabs: Receiving (purchase orders), Shipping (delivery orders), Vendors, and Customers. On the High plan with more than one location, there’s also a Transfers tab.
Find an order
Section titled “Find an order”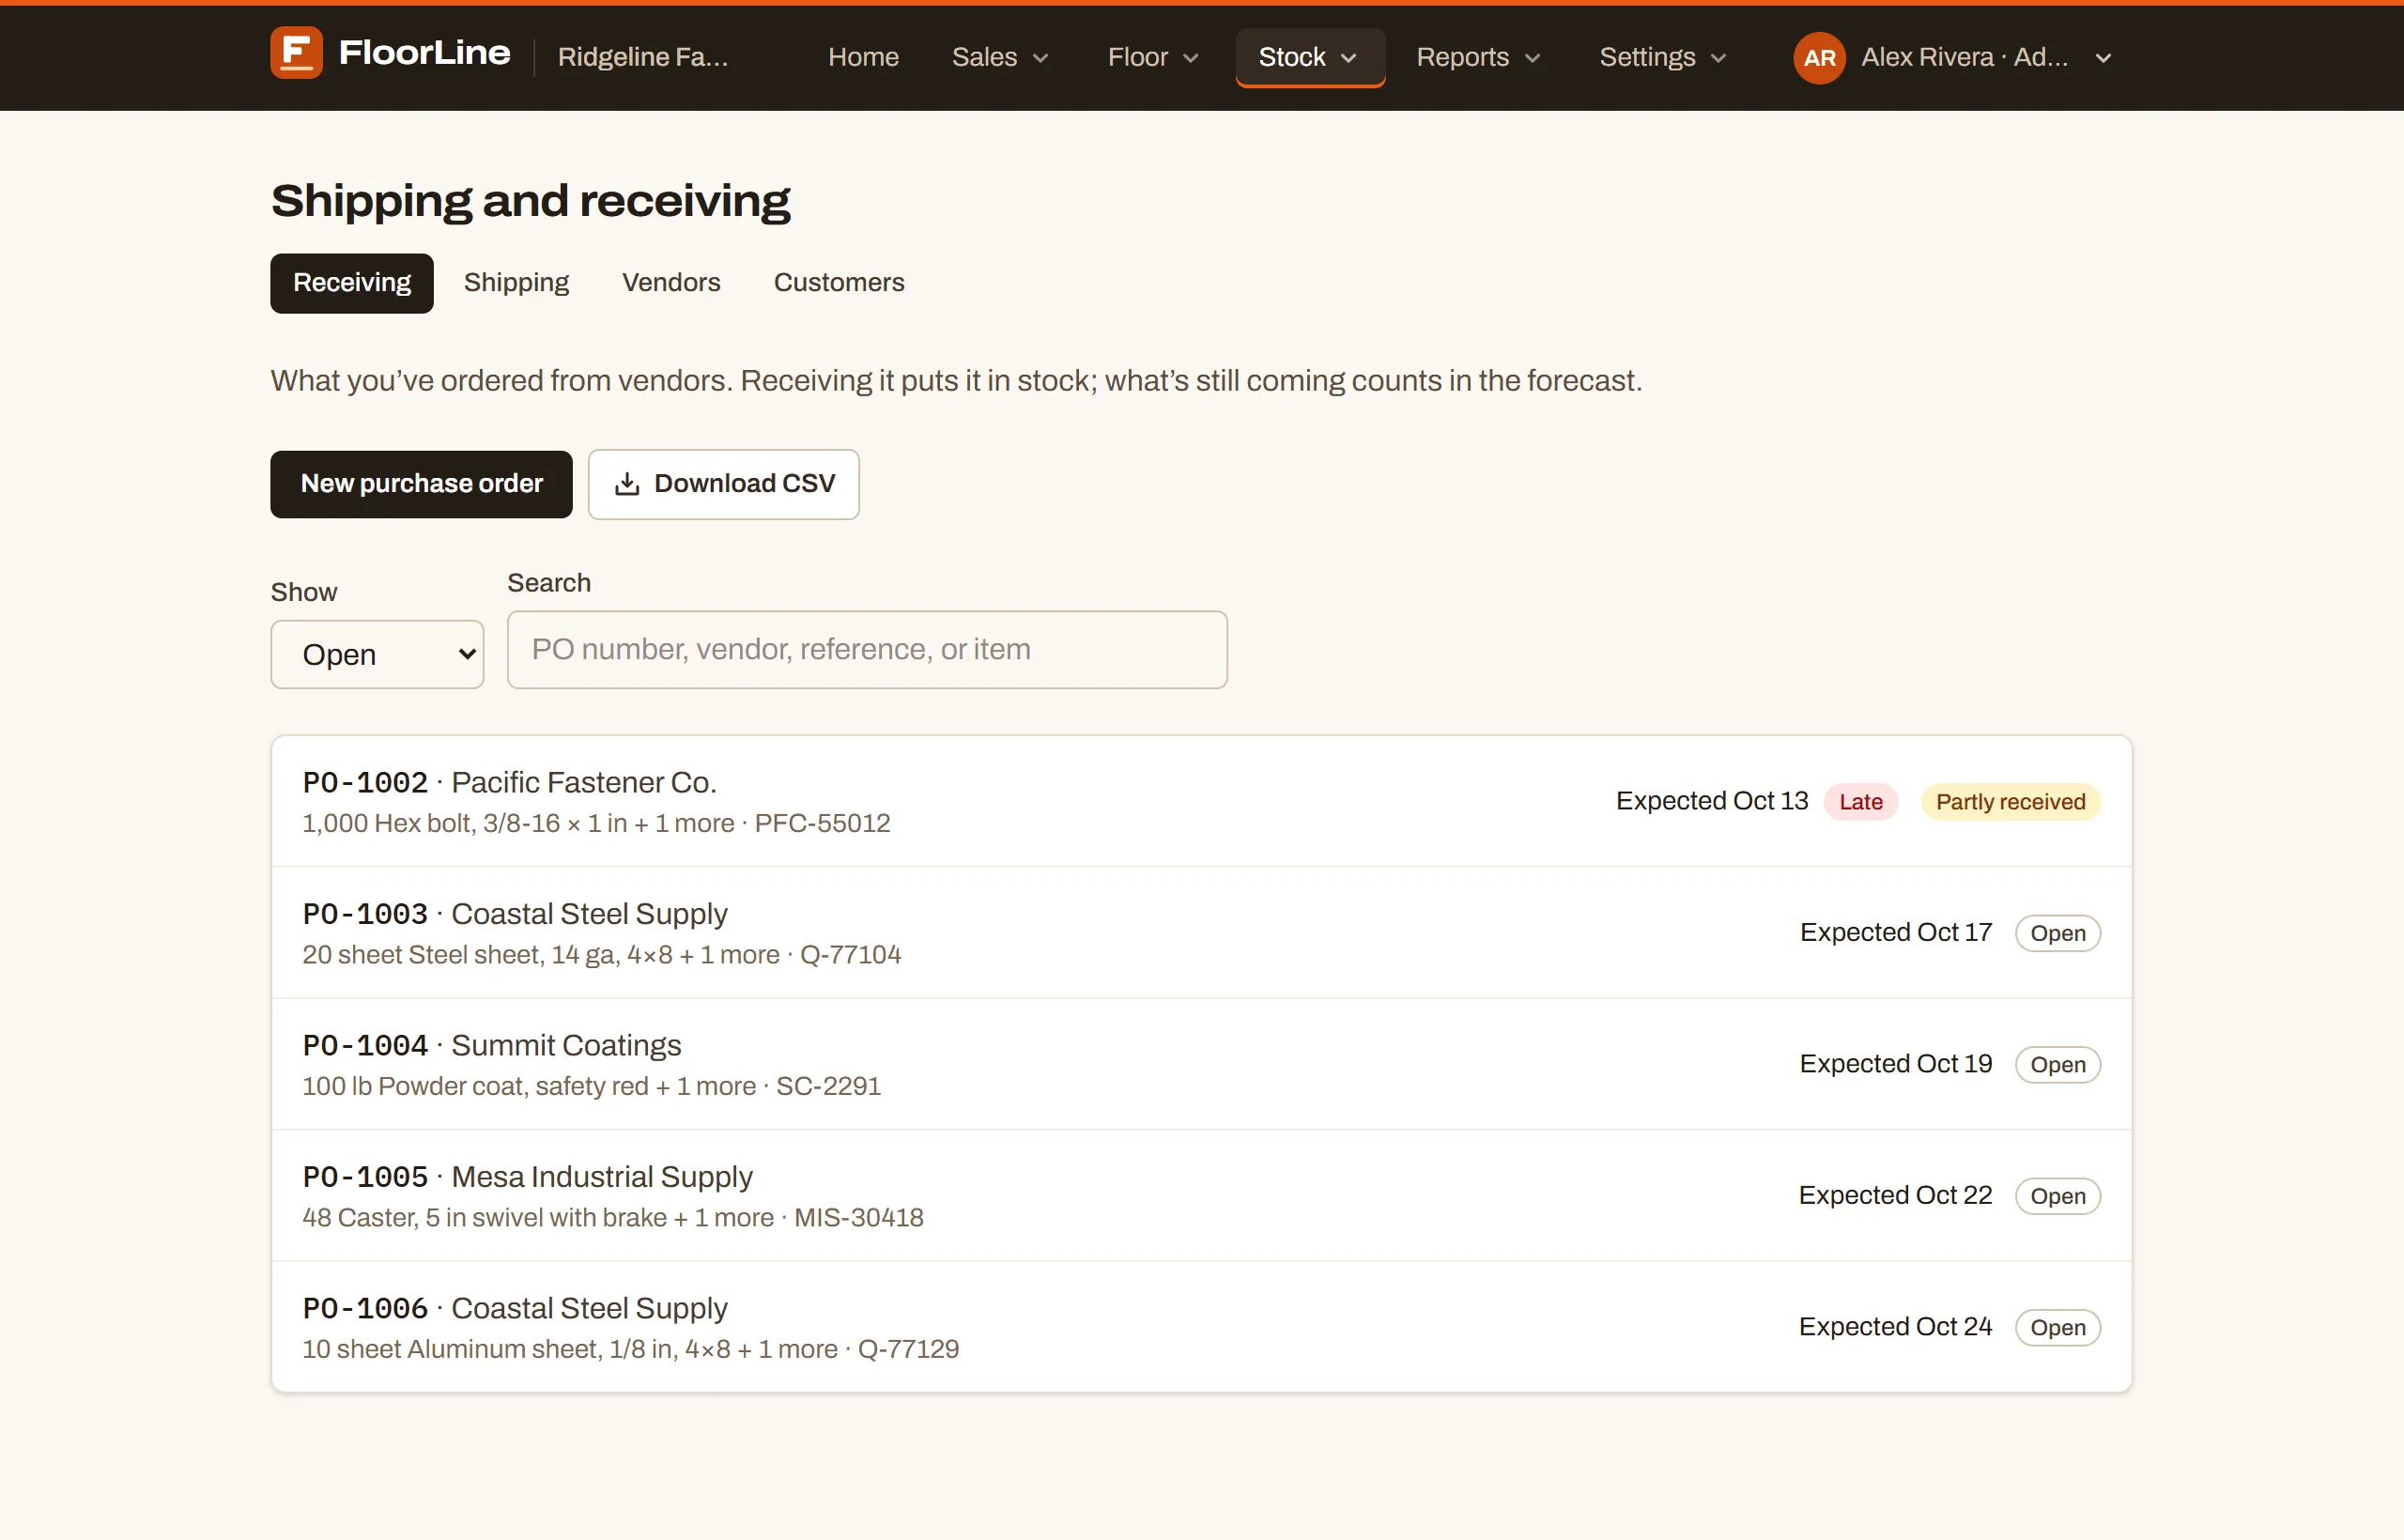
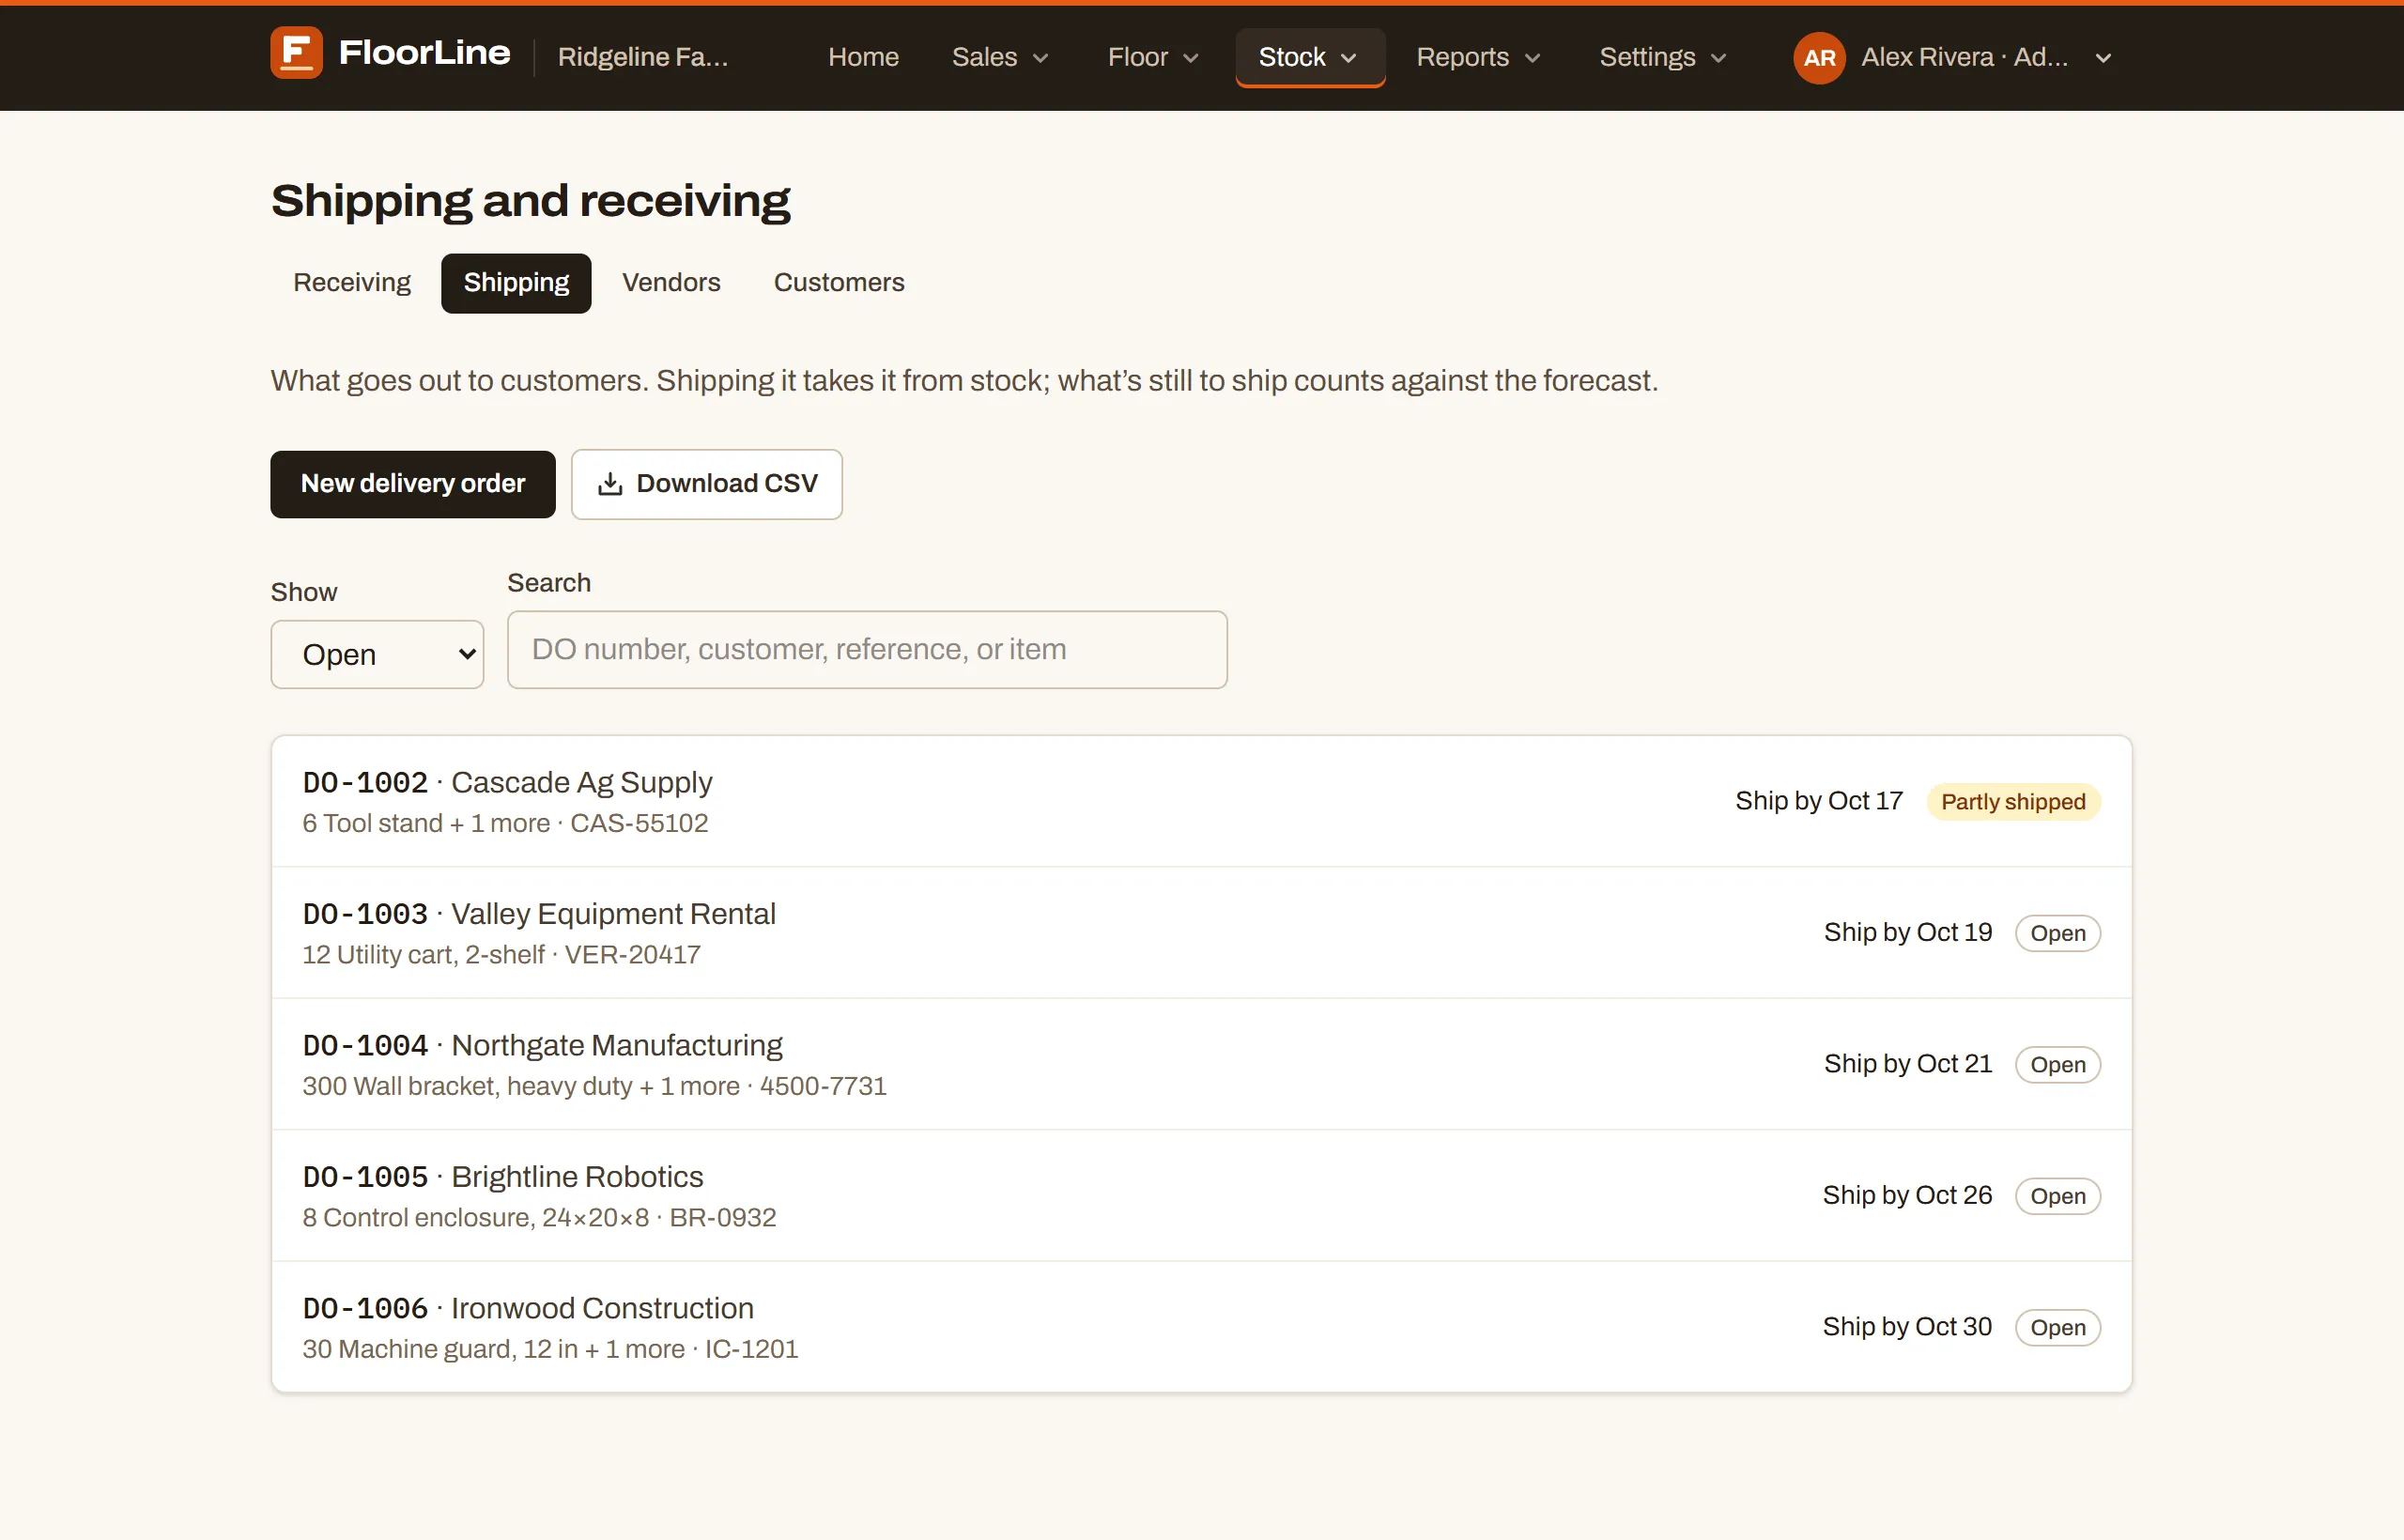
Receiving and Shipping each list their orders. Open orders come first, with the soonest date at the top. Each row shows:
- the order number and the vendor or customer
- the first item and quantity (“40 ft Square tube + 2 more”), and the reference
- the Expected date (purchase orders) or Ship by date (delivery orders), or “No date”
- a red Late badge when the order is still open and its date has passed
- the order’s status (see Statuses)
Use Show to switch between Open, Done, Canceled, and All. Use Search to find an order by its number, the vendor or customer, the reference, or an item. The list shows up to 500 orders. Search or filter to narrow it down.
The Shipping and receiving card on Home counts what’s open to receive and to ship. It also shows how many of those orders are late: open and past their date.
Create a purchase order
Section titled “Create a purchase order”-
Go to Stock → Shipping and receiving. On the Receiving tab, choose New purchase order.
-
Under Vendor, type to find the vendor and pick it. If it isn’t there yet, choose New vendor, enter a Name (and an Email if you like), and choose Add vendor. You can add the contact, phone, and address later on the vendor’s page.
-
Fill in the optional fields:
- Vendor’s reference (optional): their order or quote number.
- Expected (optional): the day you expect it to arrive. The forecast counts the items as arriving on this day.
- Notes (optional): anything else.
-
Under Items, choose Add new line. Type to find the item, then enter the Quantity in the item’s unit. The Price starts at the vendor’s price for one unit (from the item’s Vendors table), else the item’s unit cost; change it or clear it. Choose Add line for each other item. Each item goes on one line only.
-
Choose Create purchase order.
If the vendor sells the item in packs (a box of 100, say), the line shows how many packs that is, for example “= 3 box”. Quantities always stay in the item’s own unit. Set up packs in the item’s Vendors table; see Items.
Start one from Replenishment
Section titled “Start one from Replenishment”On Replenishment’s min/max view (the Basic plan), a purchased item’s suggestion, such as “Order 47 ft”, is a link. Choose it to open a new purchase order with that item and quantity already filled in. Pick the vendor and create it as usual. On Mid and up, Replenishment shows MRP’s planned orders instead, and releasing them creates purchase orders for you. See Replenishment.
Create a delivery order
Section titled “Create a delivery order”-
Go to Stock → Shipping and receiving. On the Shipping tab, choose New delivery order.
-
Under Customer, type to find the customer and pick it, or choose New customer to add one by name.
-
Fill in the optional fields:
- Customer PO (optional): the customer’s purchase order number.
- Ship by (optional): the day it must leave. The forecast counts the items as leaving on this day.
- Notes (optional): anything else.
-
Under Items, choose Add new line, pick the item, and enter the Quantity. The Price starts at the item’s sale price; change it or clear it. Add a line for each other item.
-
Choose Create delivery order.
When can it ship?
Section titled “When can it ship?”On Mid and up, a new delivery order shows when it can ship as you fill in its lines. The planner works out the date without saving anything, and it puts the new order behind every order already out, so nothing else moves. The card shows:
- Can ship and the day, with In time for the ship-by date or, for example, “2 days after the ship-by date”
- each line: in stock, on its way, or what has to be made or ordered for it
- when making what’s short starts, and about how long it takes on the floor
- What it waits on: the materials or stations holding it back the longest
An open delivery order’s page shows Expected to ship the same way, from the current plan. If the shop has no open hours set, the card says “Set the shop’s hours in Shop settings to get a date.” See When can we ship it? for how the date is worked out.
Receive a purchase order
Section titled “Receive a purchase order”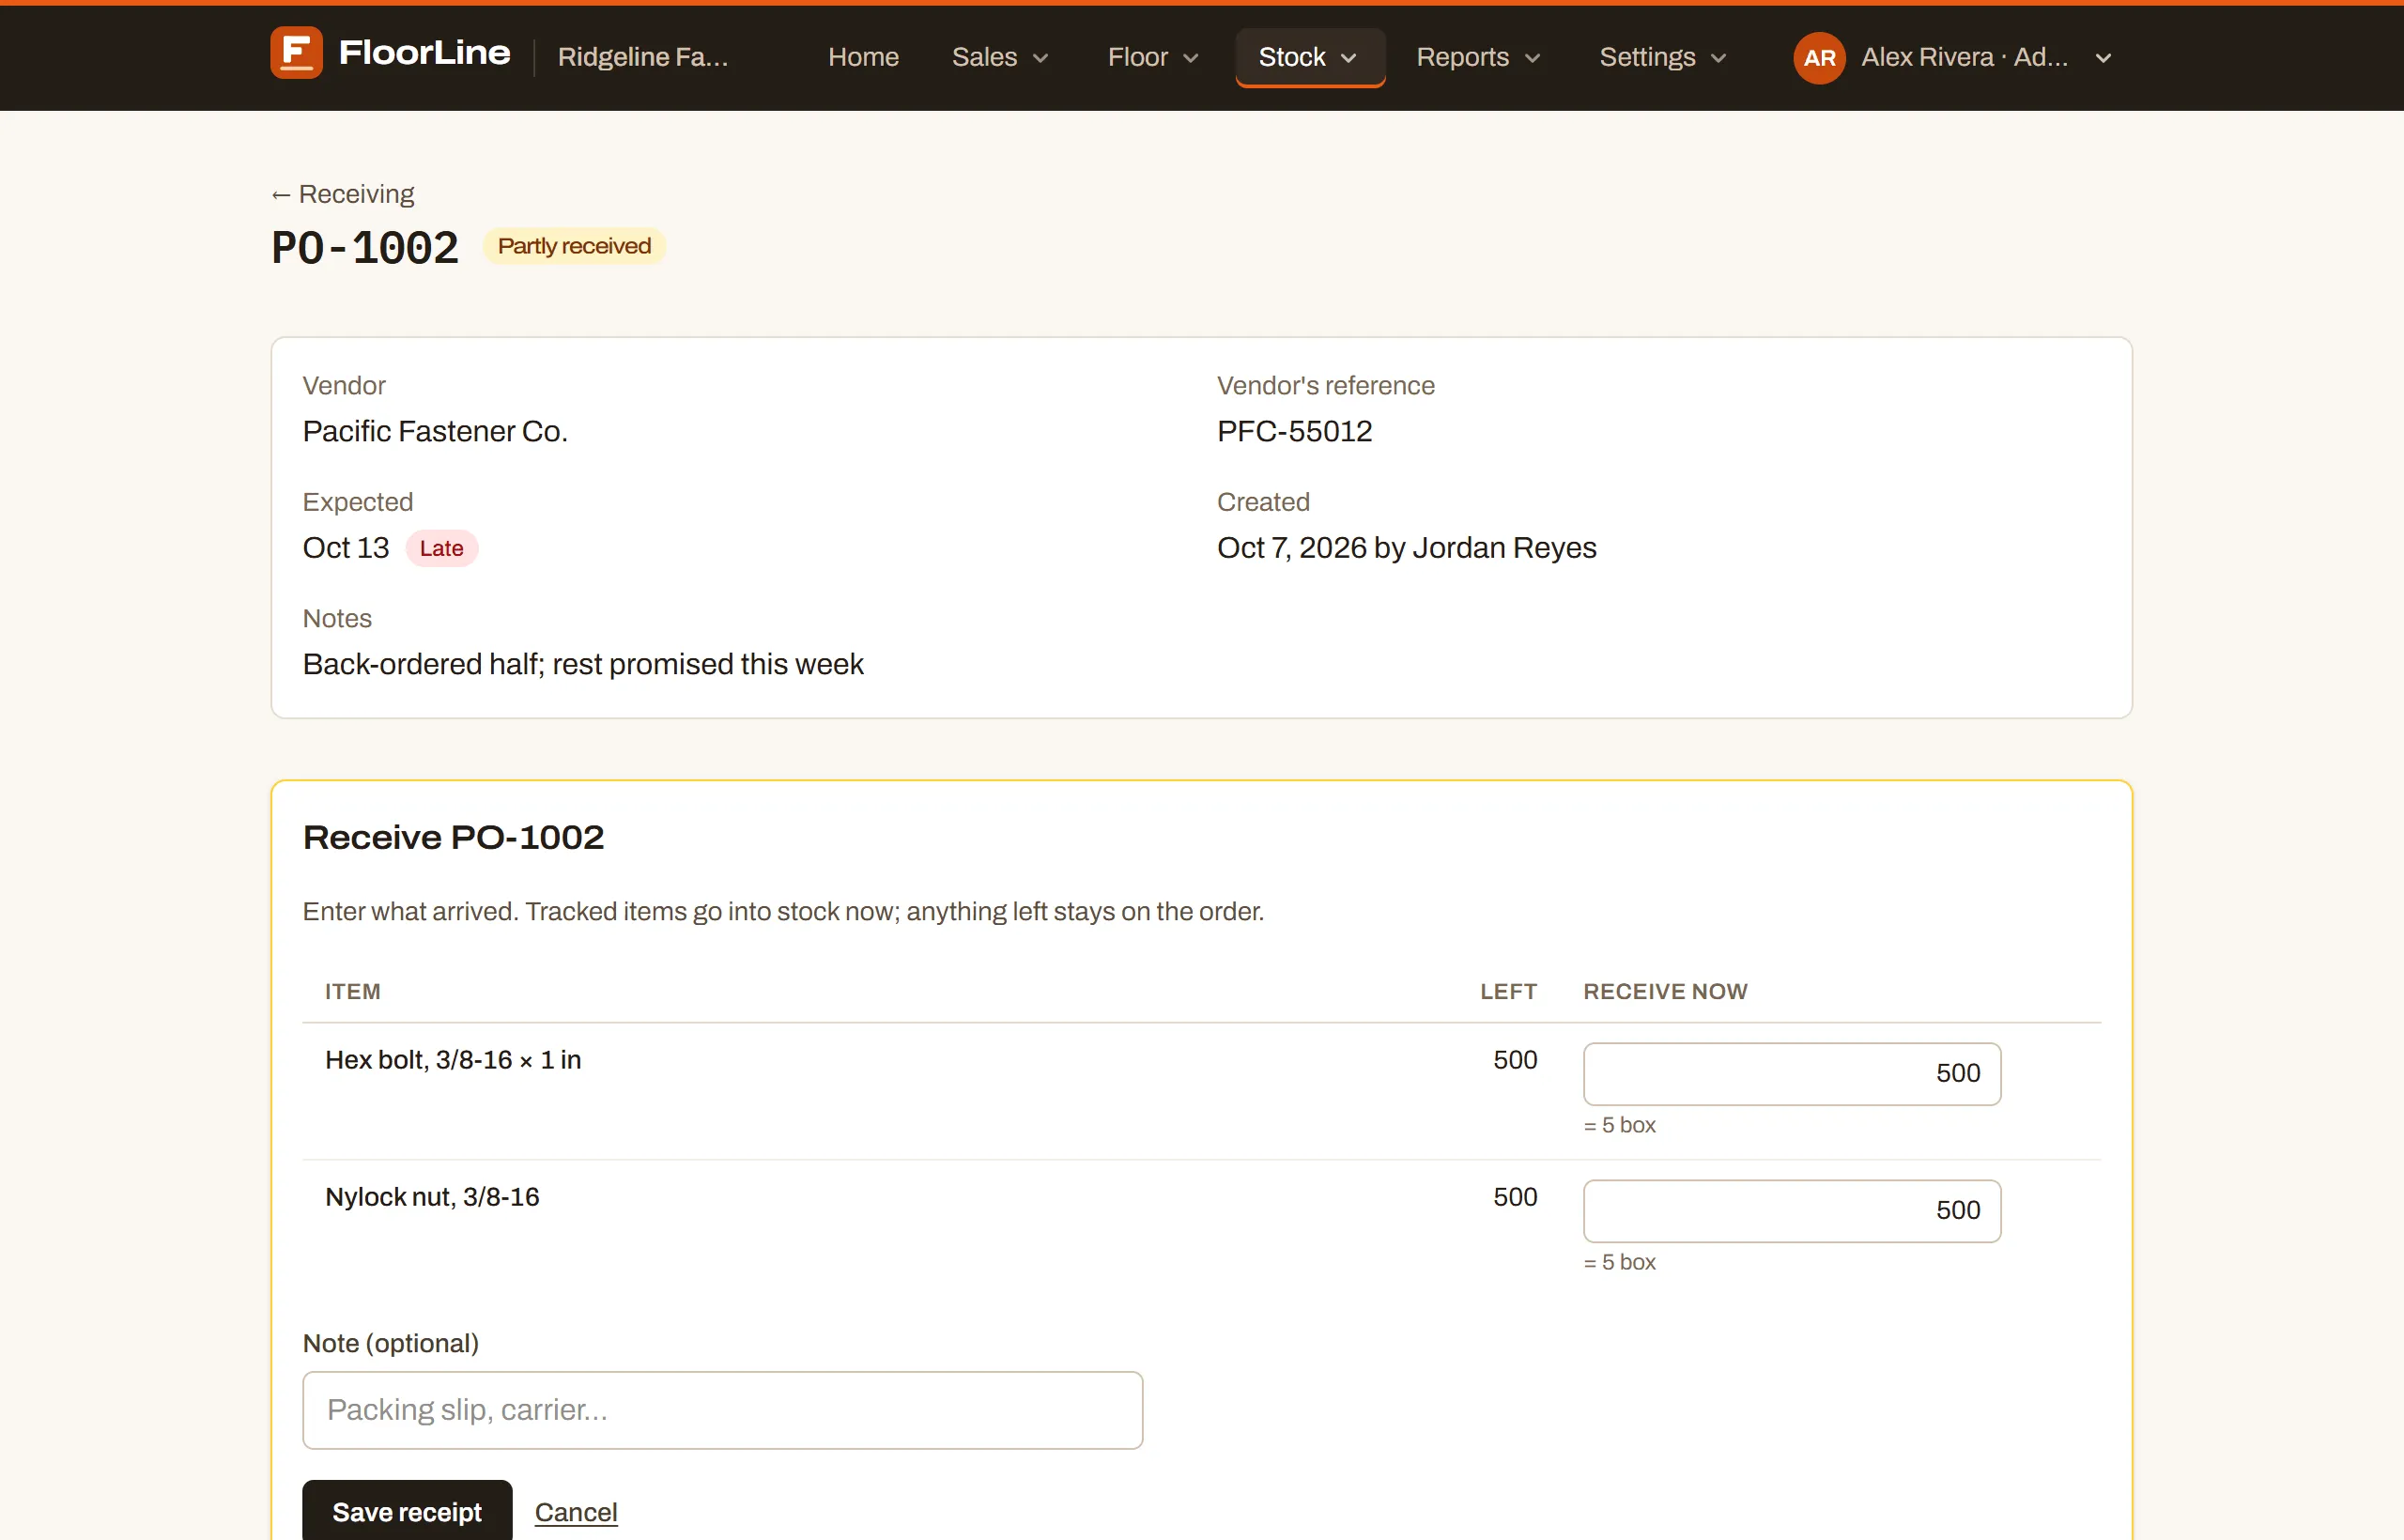
-
Open the purchase order and choose Receive.
-
The form lists each line that still has something to come, with how much is Left. Receive now starts filled in with everything that’s left. Change it to what actually arrived, or clear it (or enter 0) for a line where nothing came.
-
Optionally, add a Note, such as the packing slip number or carrier.
-
Choose Save receipt.
Tracked items go into stock right away. Anything not received stays on the order, and the order shows Partly received until the rest comes in. When every line is received in full, the order becomes Received.
You can’t receive more than is left on a line. If a vendor sends extra, edit the order’s quantity first (see Edit an order).
Ship a delivery order
Section titled “Ship a delivery order”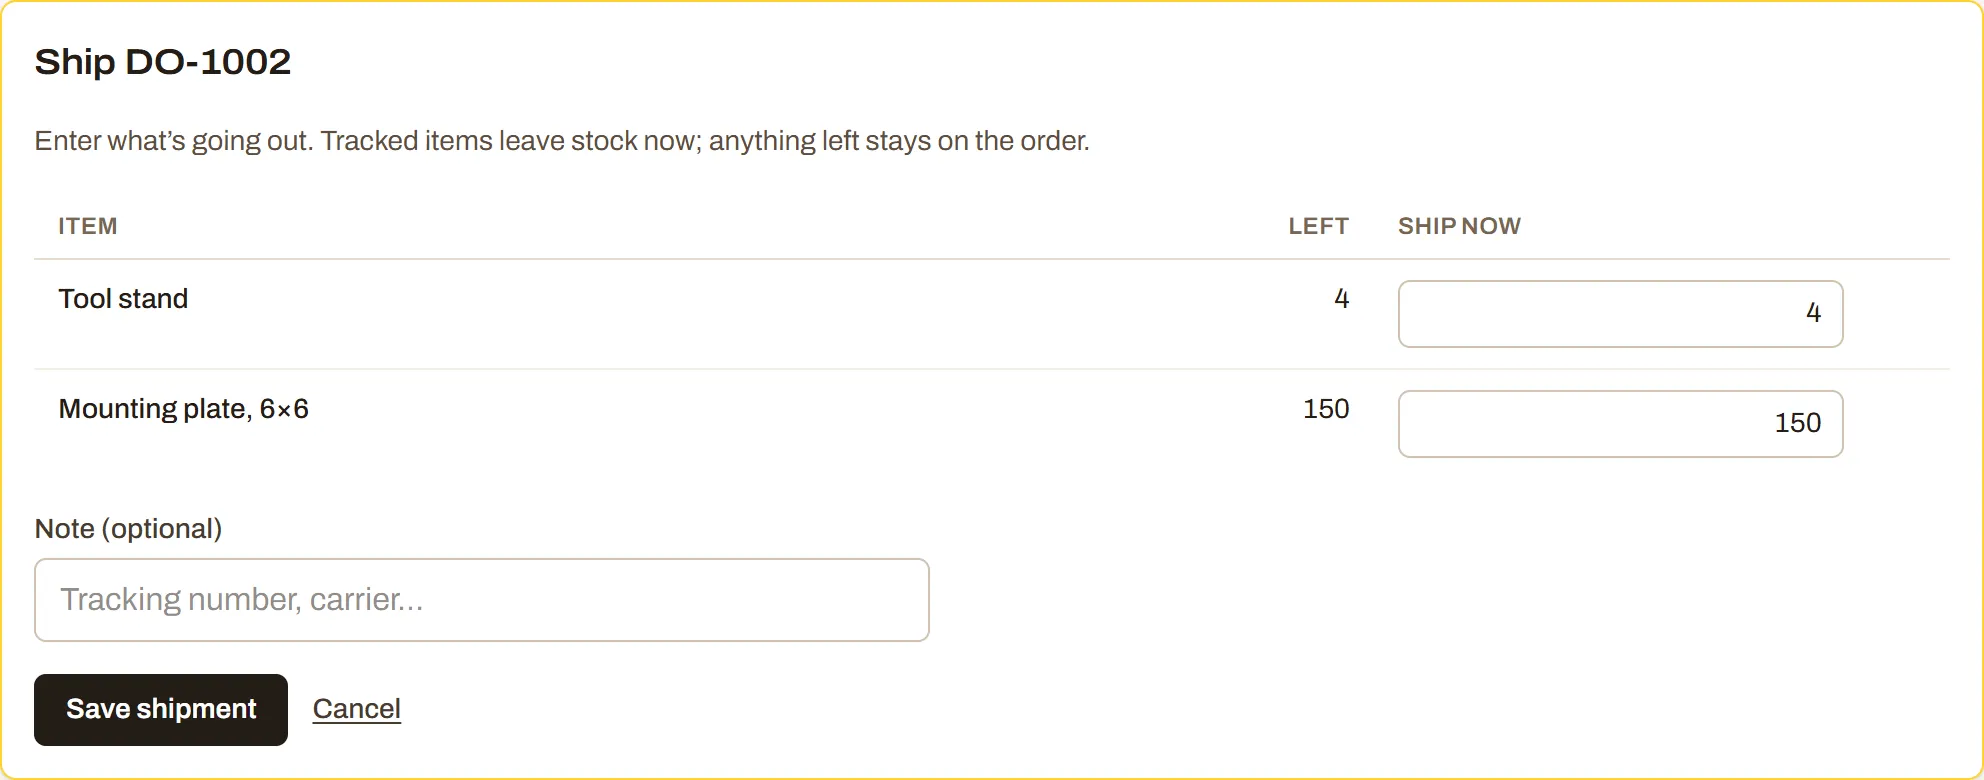
-
Open the delivery order and choose Ship.
-
Ship now starts filled in with everything that’s left on each line. Change it to what’s actually going out.
-
Optionally, add a Note, such as the tracking number or carrier.
-
Choose Save shipment.
Tracked items leave stock right away. The order shows Partly shipped until every line has shipped in full, and then Shipped.
Shipping never takes stock below zero. If there isn’t enough on hand, you’ll see “There isn’t that much in stock to ship (12 on hand). Record a count, or finish the work order that makes it, first.” Ship what you have, or bring the stock up first.
Items that aren’t tracked
Section titled “Items that aren’t tracked”An item with stock tracking turned off shows “Not tracked: no stock moves”. You still receive or ship it, so the order records what came in or went out, but no stock changes.
Lots and serial numbers
Section titled “Lots and serial numbers”Items counted by lot or by serial number need more detail when they move:
- Receiving a lot item: enter the Lot number and how much came in that lot. If it arrived as more than one lot, choose Split into another lot. You can also enter each lot’s expiry or best-by date. Leave it blank and an existing lot keeps its date, while a new lot gets the item’s shelf life.
- Shipping a lot item: pick the lots it comes from. The form fills them in for you, soonest-dated first, and skips expired lots. Choose Take from another lot to add one.
- Serial-numbered items: choose Enter serial numbers when receiving, or Pick serial numbers to choose units in stock when shipping. You need one serial number per unit.
The order’s history lists the lots and serial numbers of each receipt and shipment. See Lots and serial numbers for the full rules.
Statuses
Section titled “Statuses”| Status | Meaning |
|---|---|
| Open | Nothing received or shipped yet. |
| Partly received / Partly shipped | Some has moved; the rest is still to come or to go. |
| Received / Shipped | Every line is done in full. |
| Canceled | Canceled before anything moved. |
| Closed | Canceled after some had already moved. What moved stays; the rest came off. |
An open order whose date has passed also gets a red Late badge, in the list and on its page.
The order page
Section titled “The order page”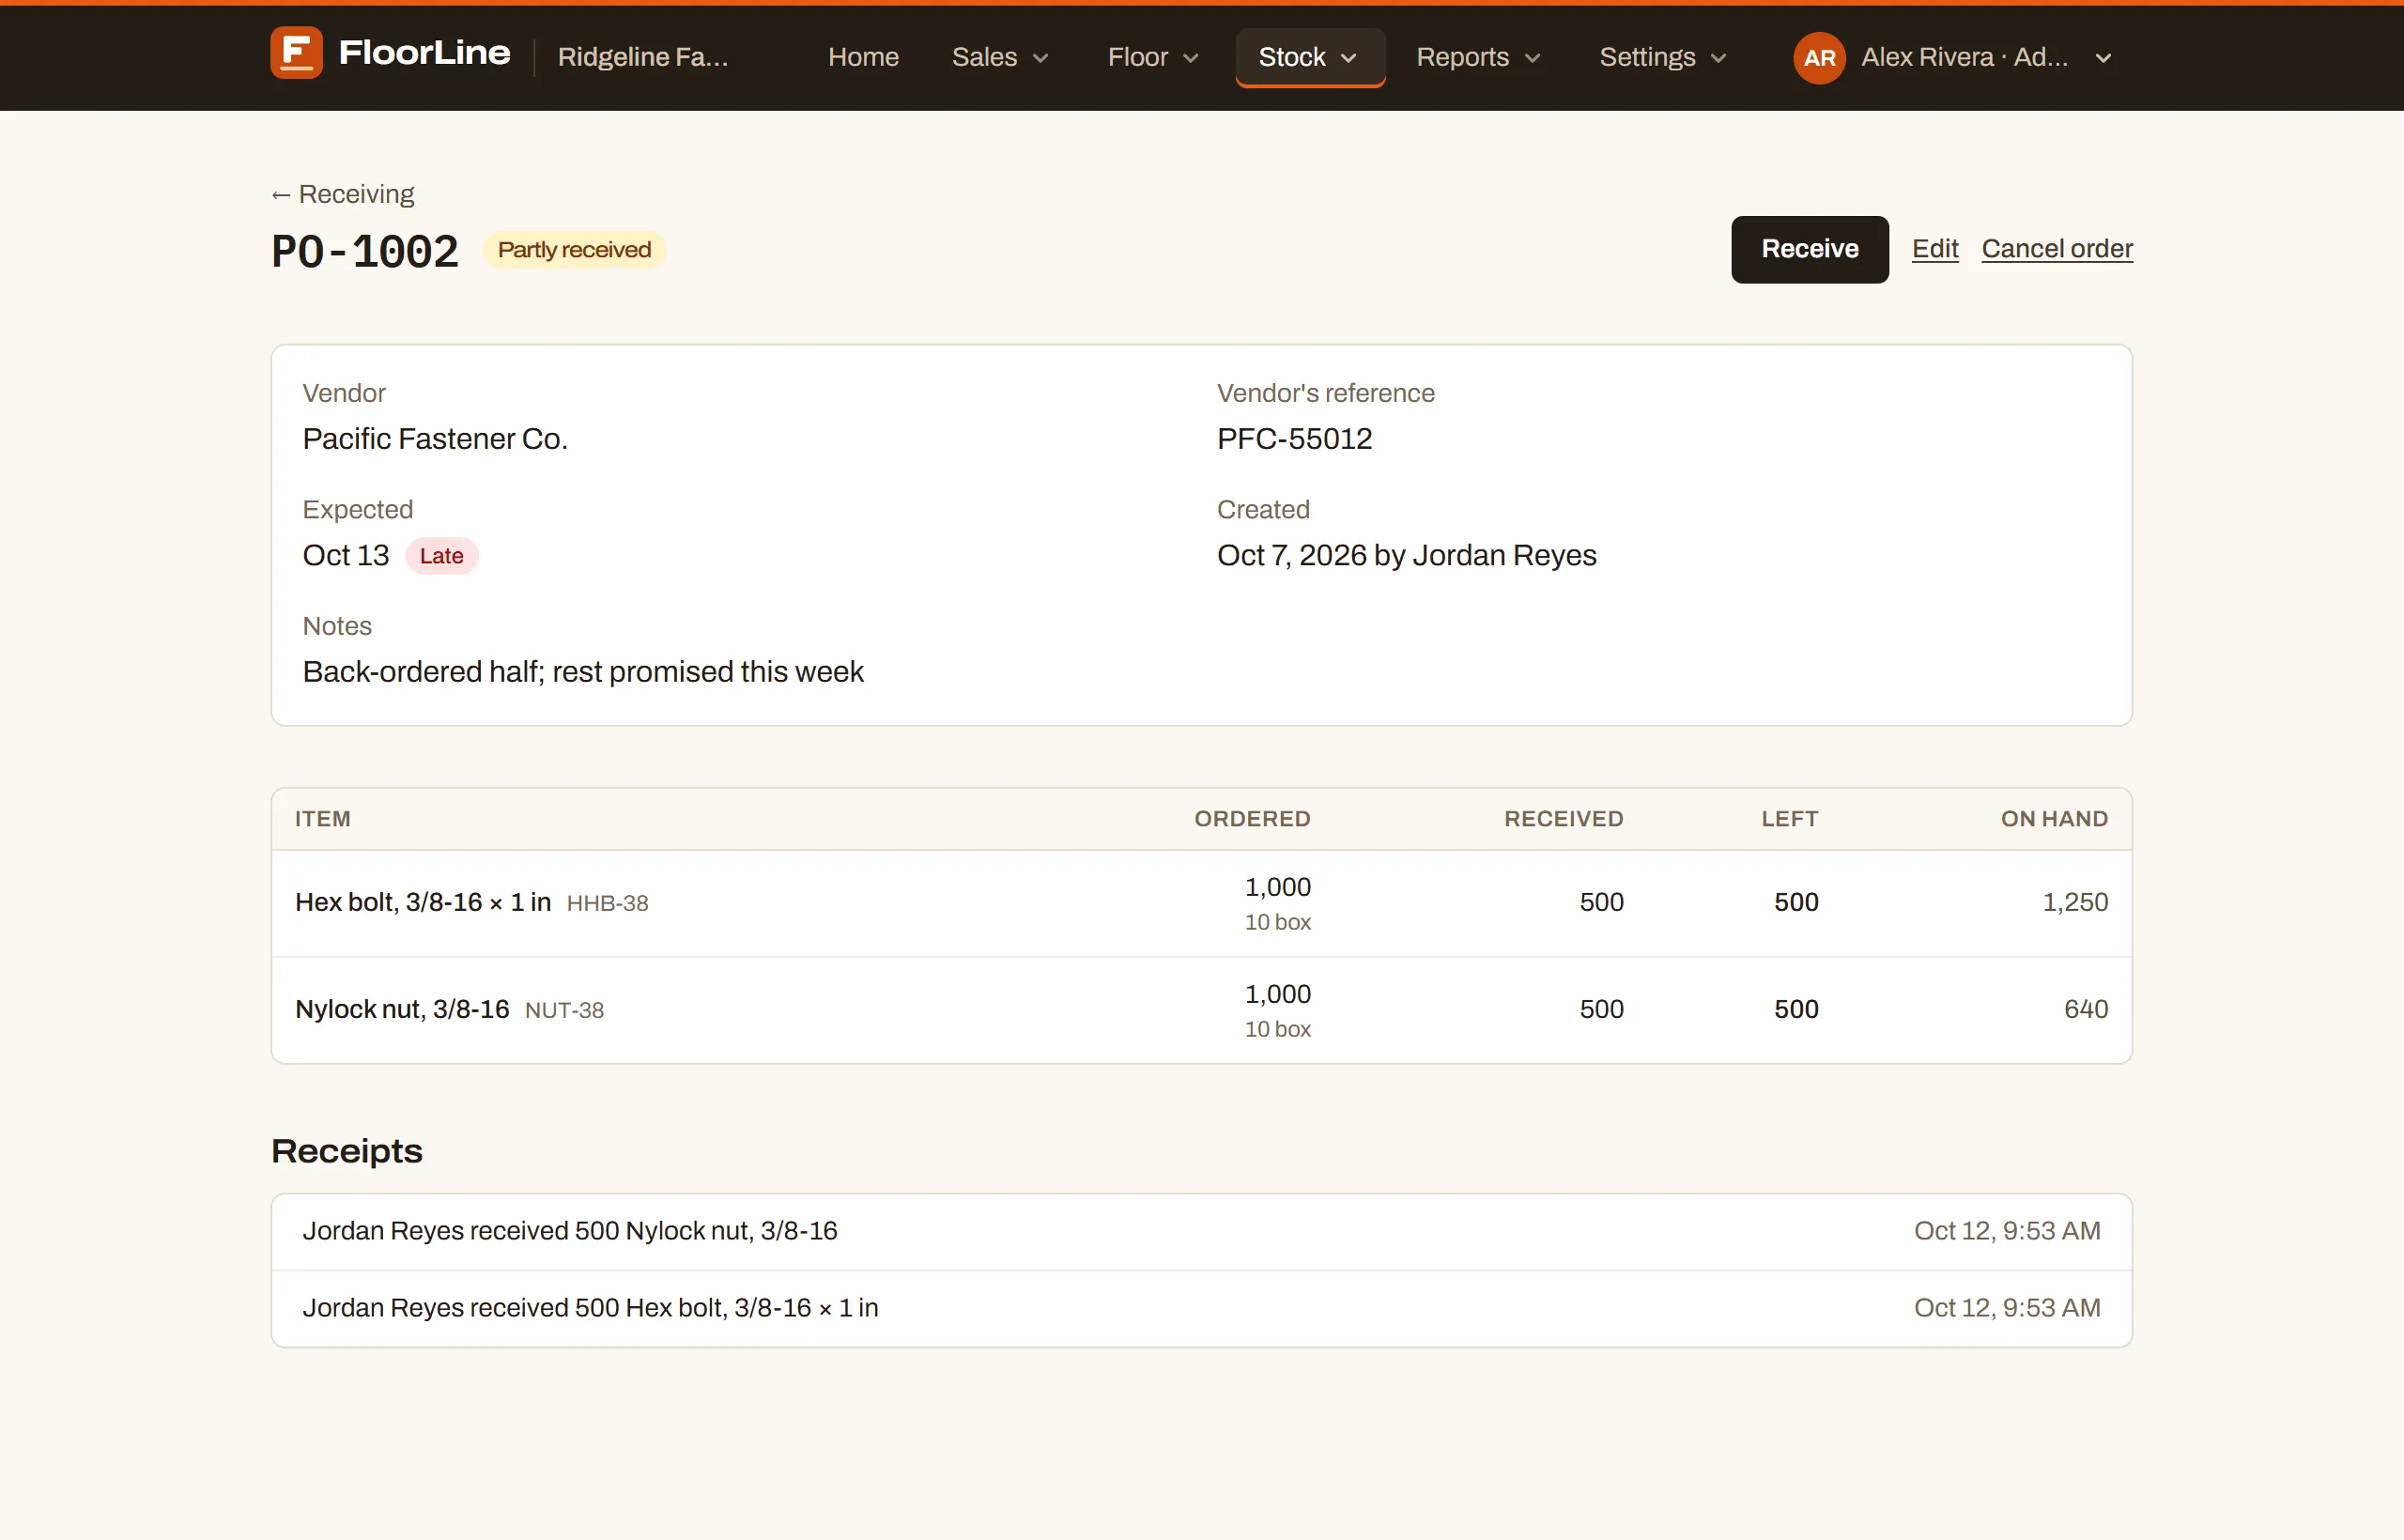
An order’s page shows the vendor or customer (linked to its page), the reference, the date, who created it and when, the day it was finished, and any notes. The lines table has each item’s Ordered, Received or Shipped, Left, On hand (or “Not tracked”), Price, and Amount, with the order’s Total once every line has a price.
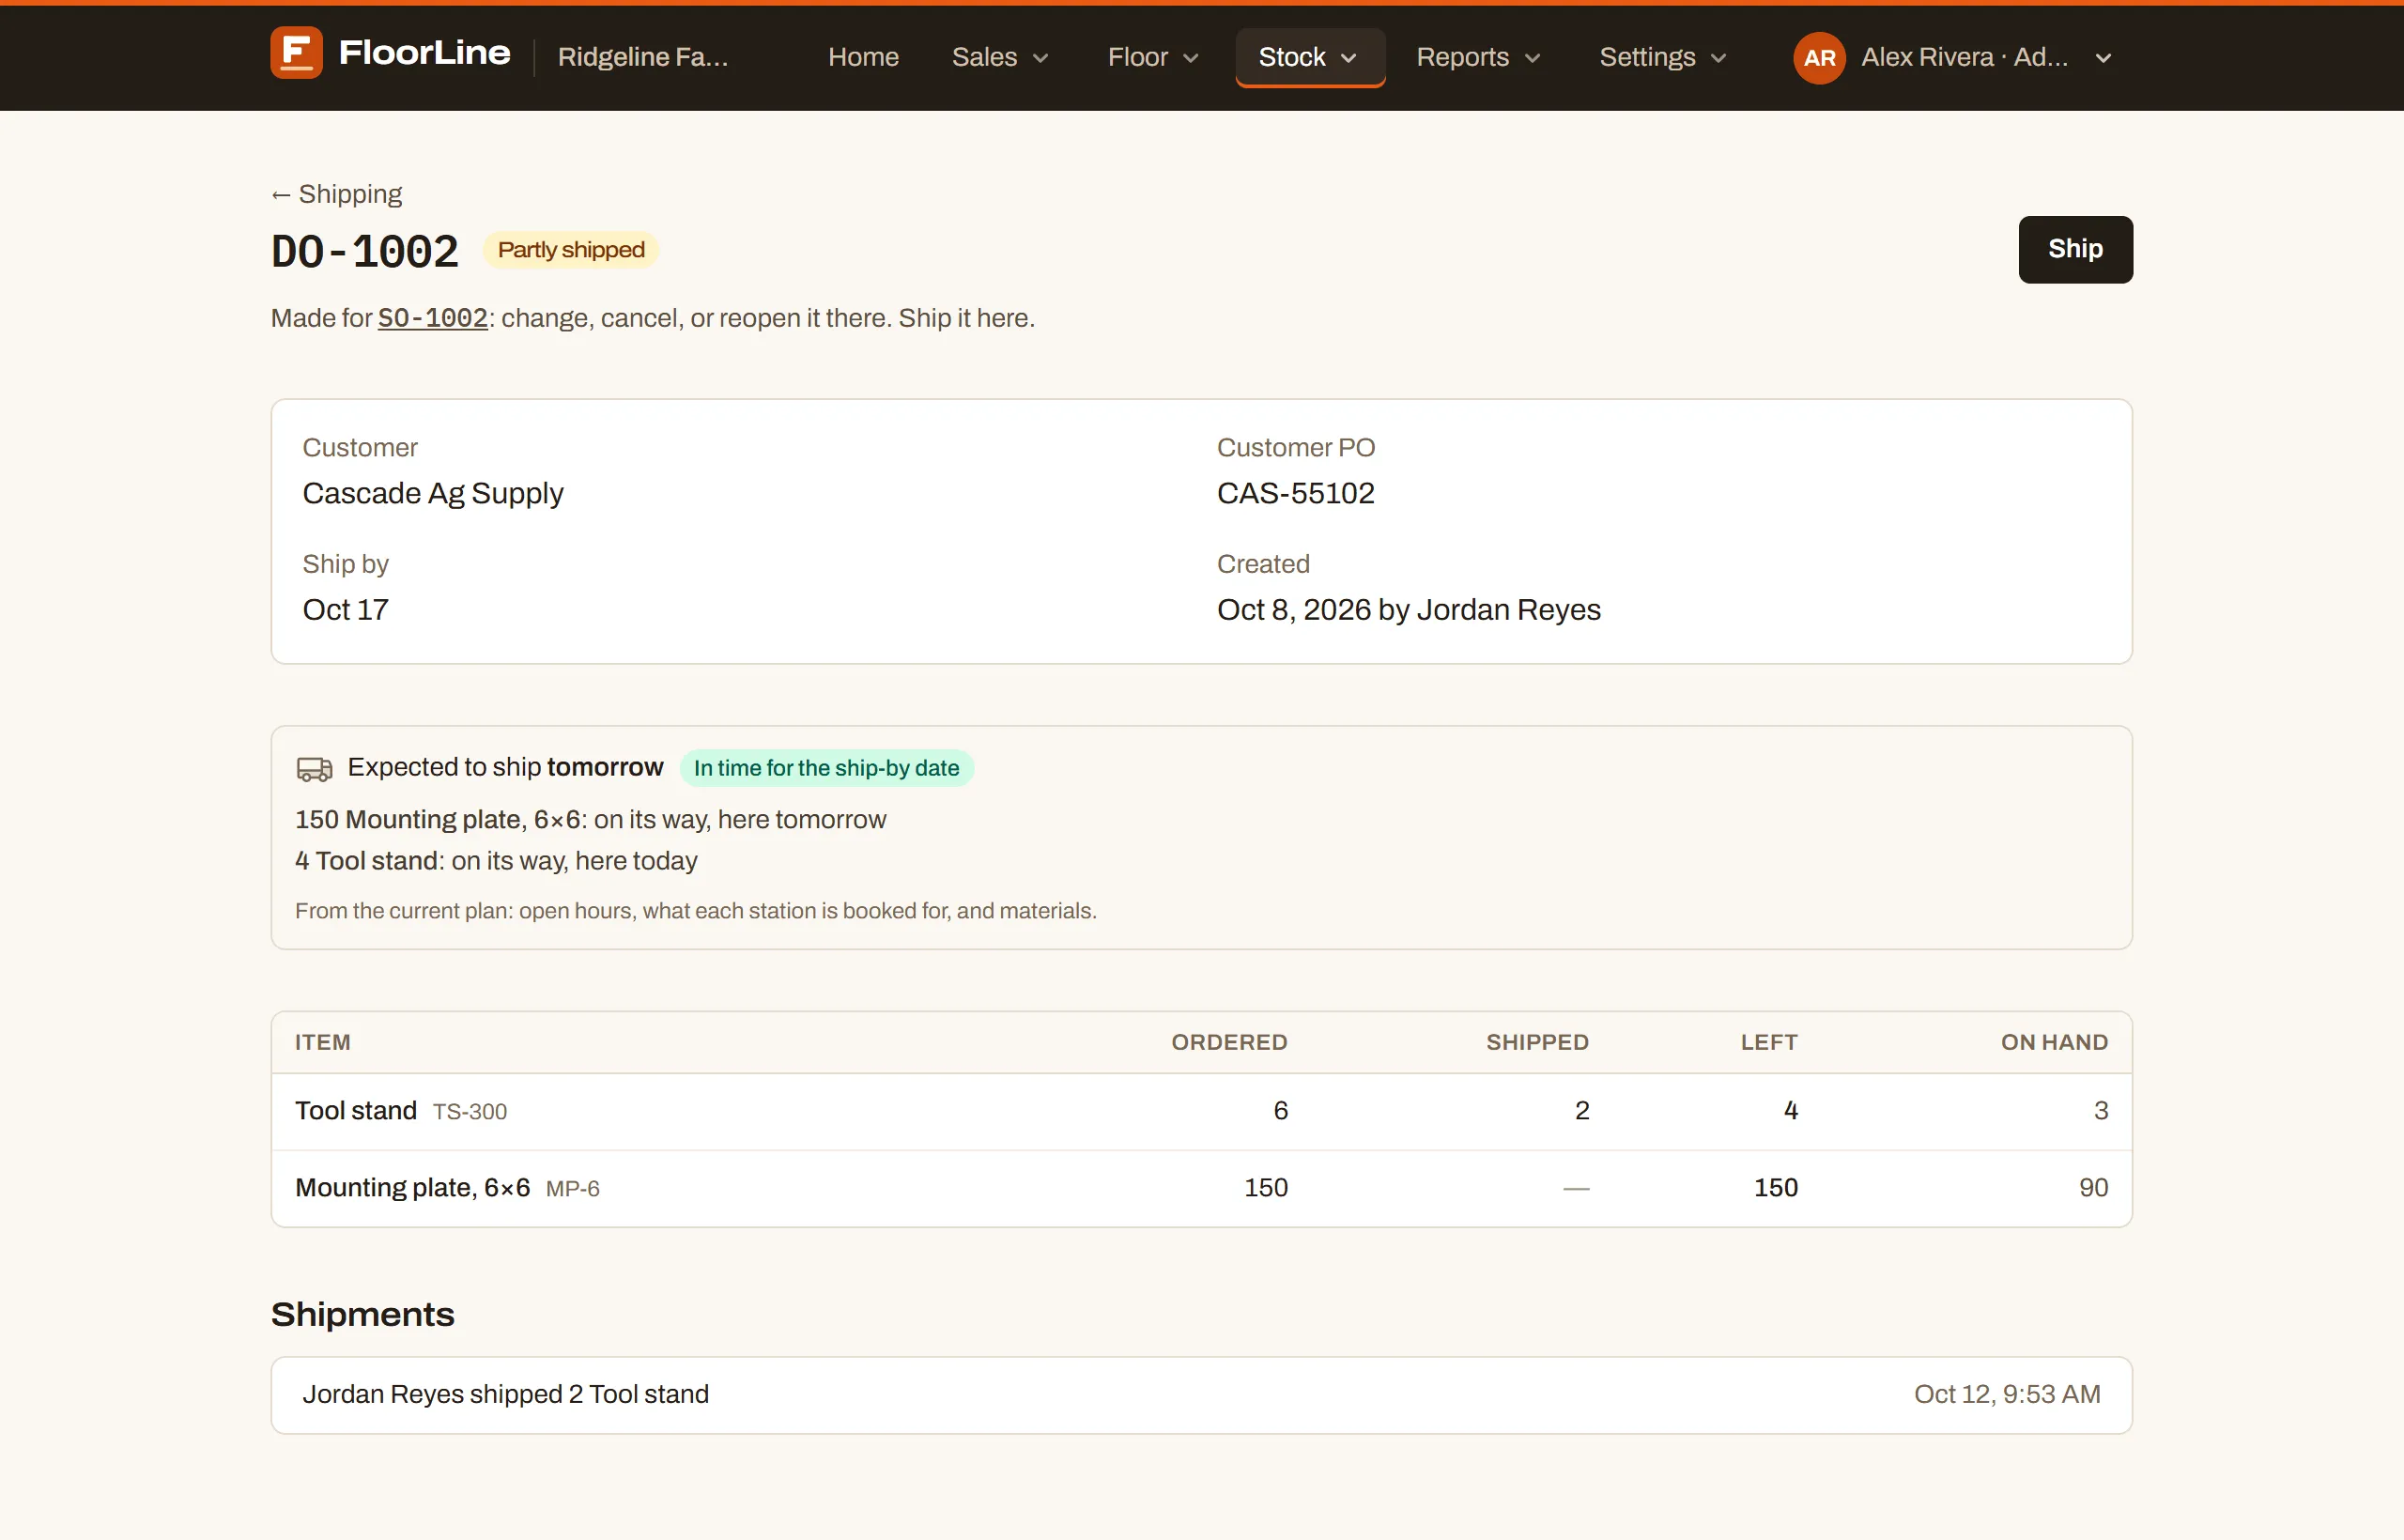
Below the lines, Receipts (purchase orders) or Shipments (delivery orders) is the order’s history, newest first. Each entry says who received or shipped how much of which item, the note, any lots or serial numbers, and when. The item’s stock history shows the same moves, for example “Received on PO-1001” or “Shipped on DO-1001”.
Edit an order
Section titled “Edit an order”You can change an order while it’s open. Choose Edit, change what you need, and choose Save changes.
- You can change the vendor or customer, reference, date, notes, and lines.
- A line that has already moved stays on the order. Its quantity can’t go below what’s been received or shipped, and its Remove button is off.
- If you lower every line to what’s already moved, the order is finished and becomes Received or Shipped.
- New lines need active items. Archived items can’t be added.
Cancel or reopen an order
Section titled “Cancel or reopen an order”-
On an open order, choose Cancel order.
-
Choose Cancel PO-1002 (or the order’s number) to confirm, or Keep it to back out.
Canceling takes whatever is left off the forecast. What already moved stays, so an order canceled after a partial receipt shows Closed.
To bring a canceled order back, open it and choose Reopen. What was left goes back on the order and into the forecast.
Delivery orders from a sales order
Section titled “Delivery orders from a sales order”A delivery order made by a sales order says “Made for SO-1001: change, cancel, or reopen it there. Ship it here.” It has no Edit or Cancel order button. Change, cancel, or reopen the sales order instead, and ship the delivery order here as usual.
Received at and ships from
Section titled “Received at and ships from”With more than one location, each order has a Received at (purchase orders) or Ships from (delivery orders) location. A new order starts at the location picked in the header, and you can change it on the form. Receiving puts stock in at that location. Shipping takes it from there, and checks the stock, lots, and serial numbers at that location. To move stock between locations, use the Transfers tab. See Locations.
Download a list
Section titled “Download a list”Download CSV on the Receiving or Shipping list downloads the orders you’re looking at (the same Show filter and search), one row per line. See Export to CSV.