
Get started
This walk-through takes a new shop from sign-up to a first job worked on the floor. You’ll set up two stations, one operator, and one item, then run a work order through a tablet and watch it on Live view.
You’ll need about half an hour, a computer, and a tablet or phone to act as the station tablet. If you don’t have a spare device yet, a second browser window on your computer works for trying it out.
The screenshots follow a made-up shop, Acme Machining, and its owner, Dana Brooks.
1. Create your shop
Section titled “1. Create your shop”-
Go to floorlinehq.com/signup.
-
Fill in the form:
- Shop name: your company’s name, as people in the shop know it. You can change it later.
- Shop address: the start of your shop’s web address, like
acmeforacme.floorlinehq.com. Use 3 to 30 letters, numbers, or hyphens. FloorLine tells you right away if it’s available. This address can’t be changed later, so pick one you’ll keep. - Your name, Work email, and Password (at least 12 characters).
-
Tick the box to agree to the Terms of Service and the Privacy Policy. The news-and-tips box is optional and starts off.
-
Select Create shop.
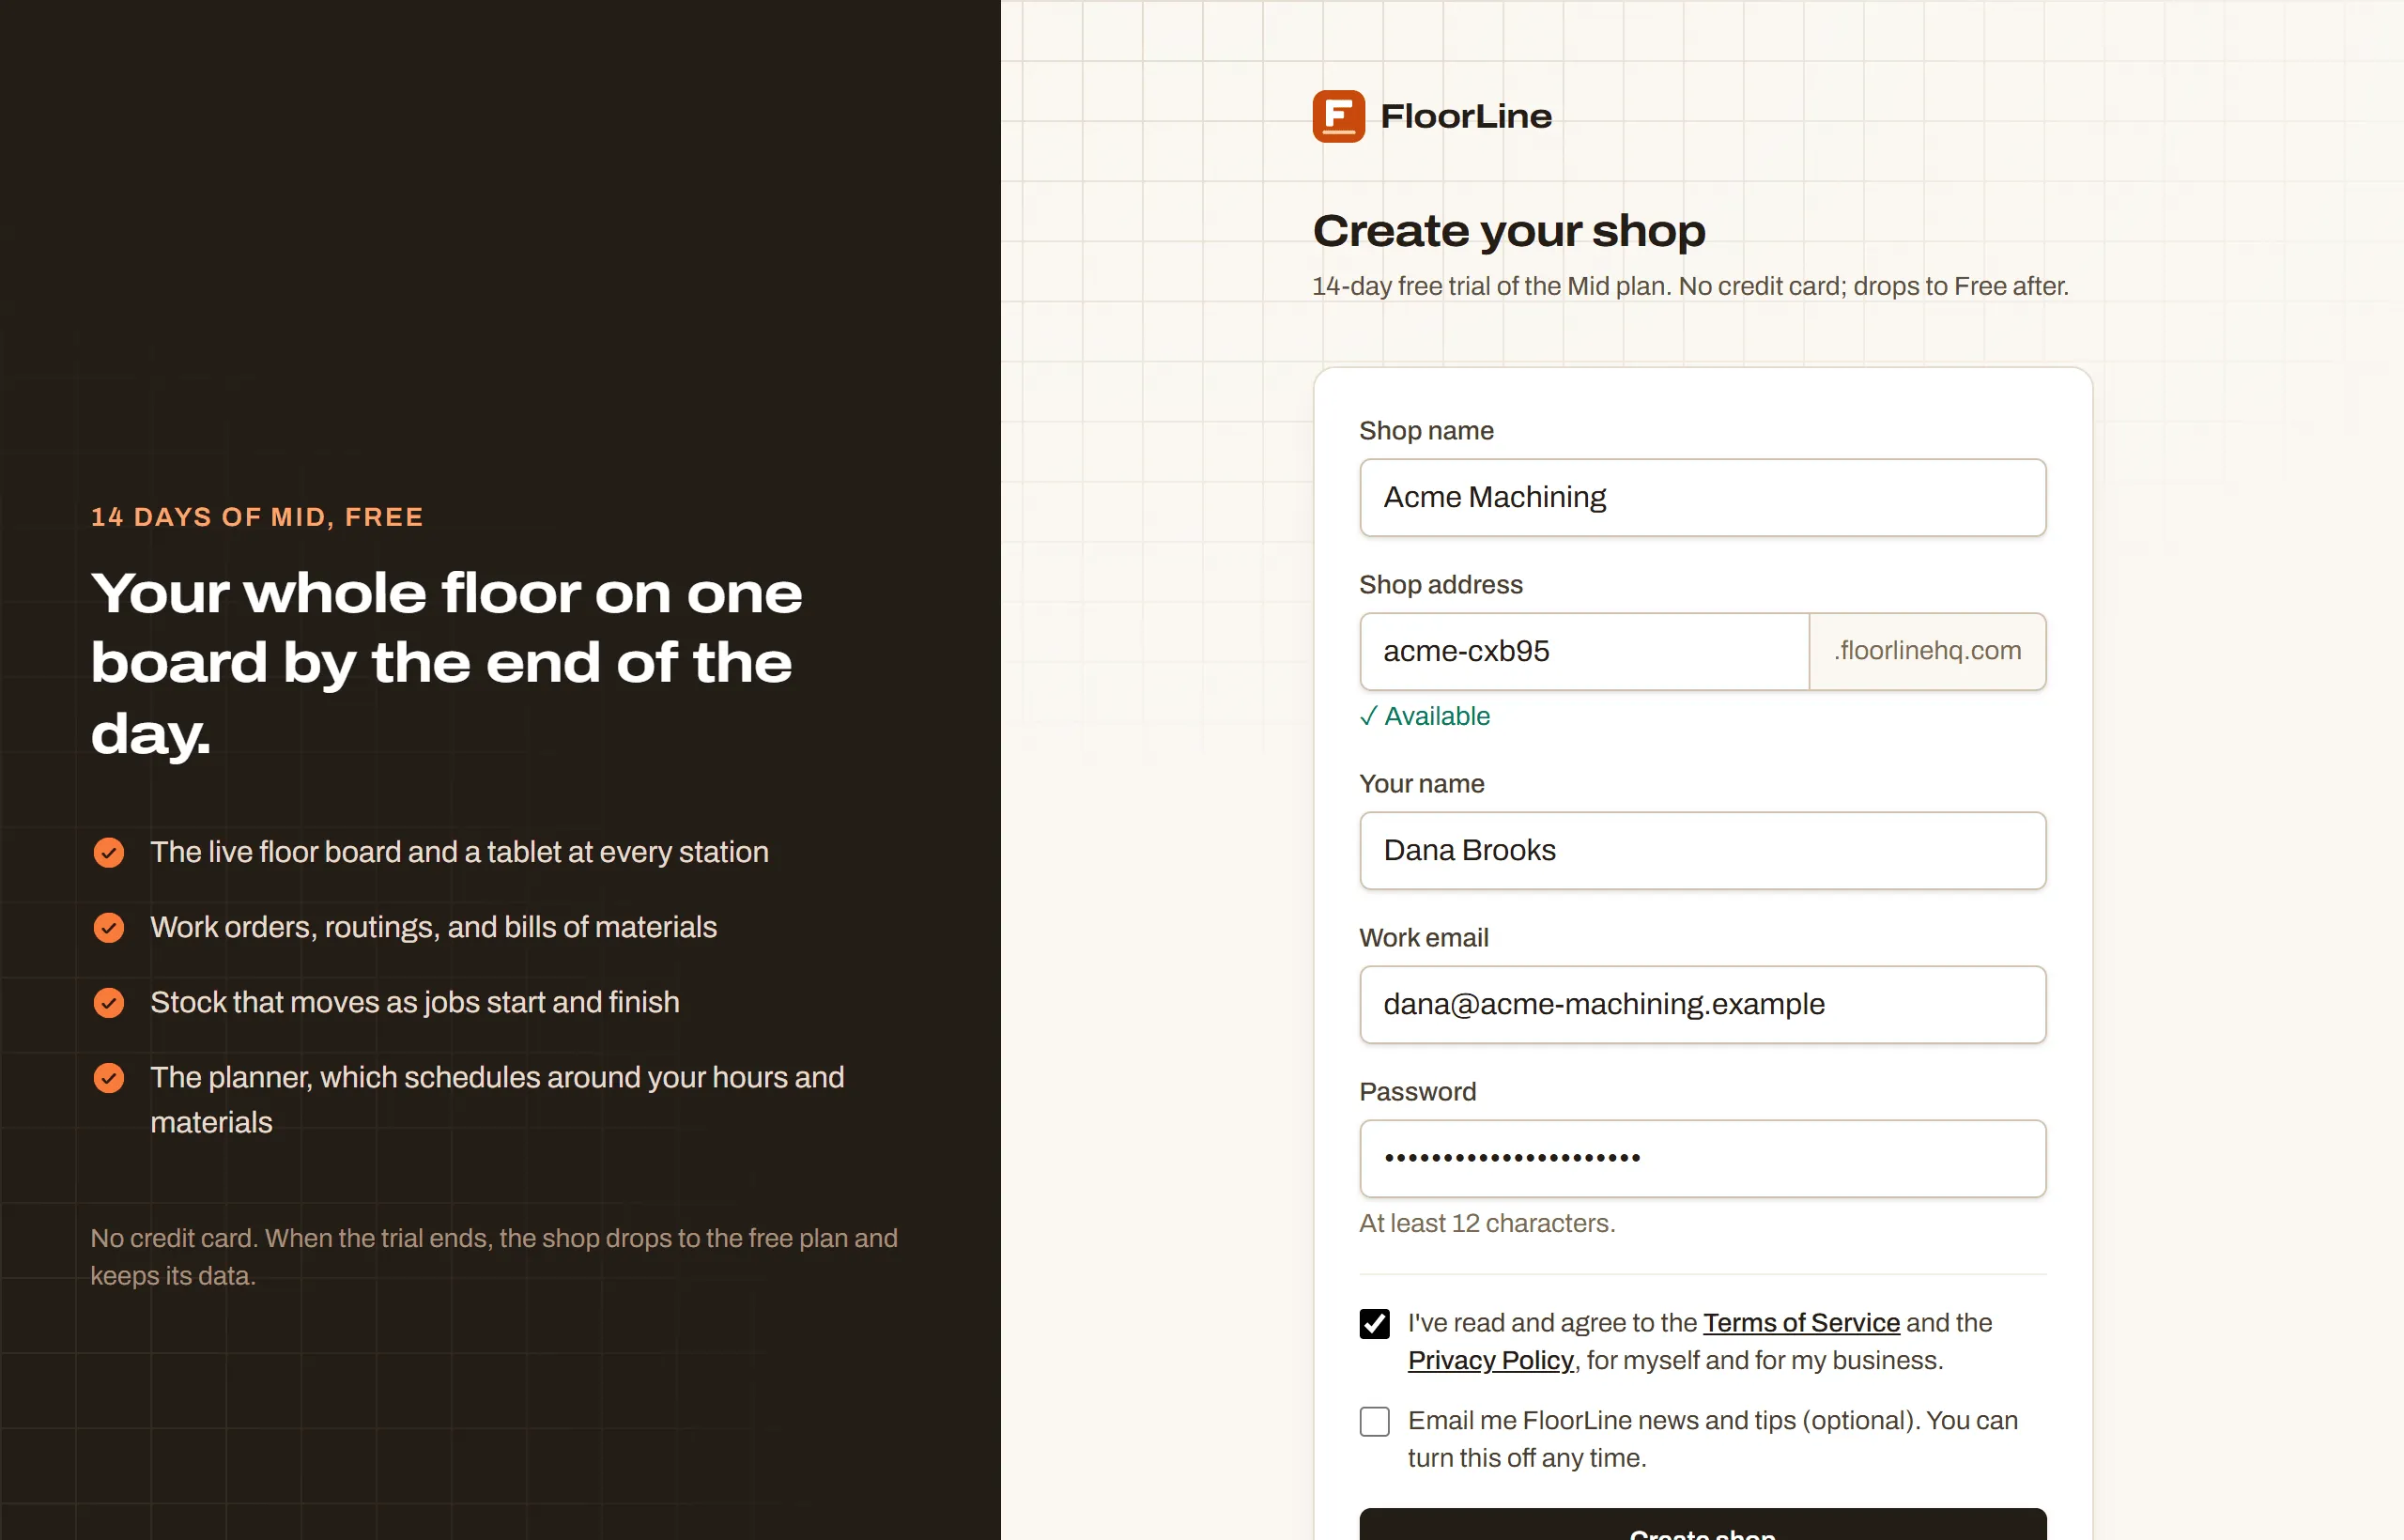
FloorLine creates the shop and takes you to its own address, signed in as the owner. Your shop starts on a 14-day free trial of the Mid plan, with no credit card. If you don’t pick a plan by the end, it moves to the Free plan; nothing you set up is lost. See Plans and limits.
2. Confirm your email
Section titled “2. Confirm your email”A yellow banner at the top of every page says Confirm your email address. Open the email FloorLine sent you and follow the link. If it didn’t arrive, select Resend in the banner.
You can keep setting up while you wait.
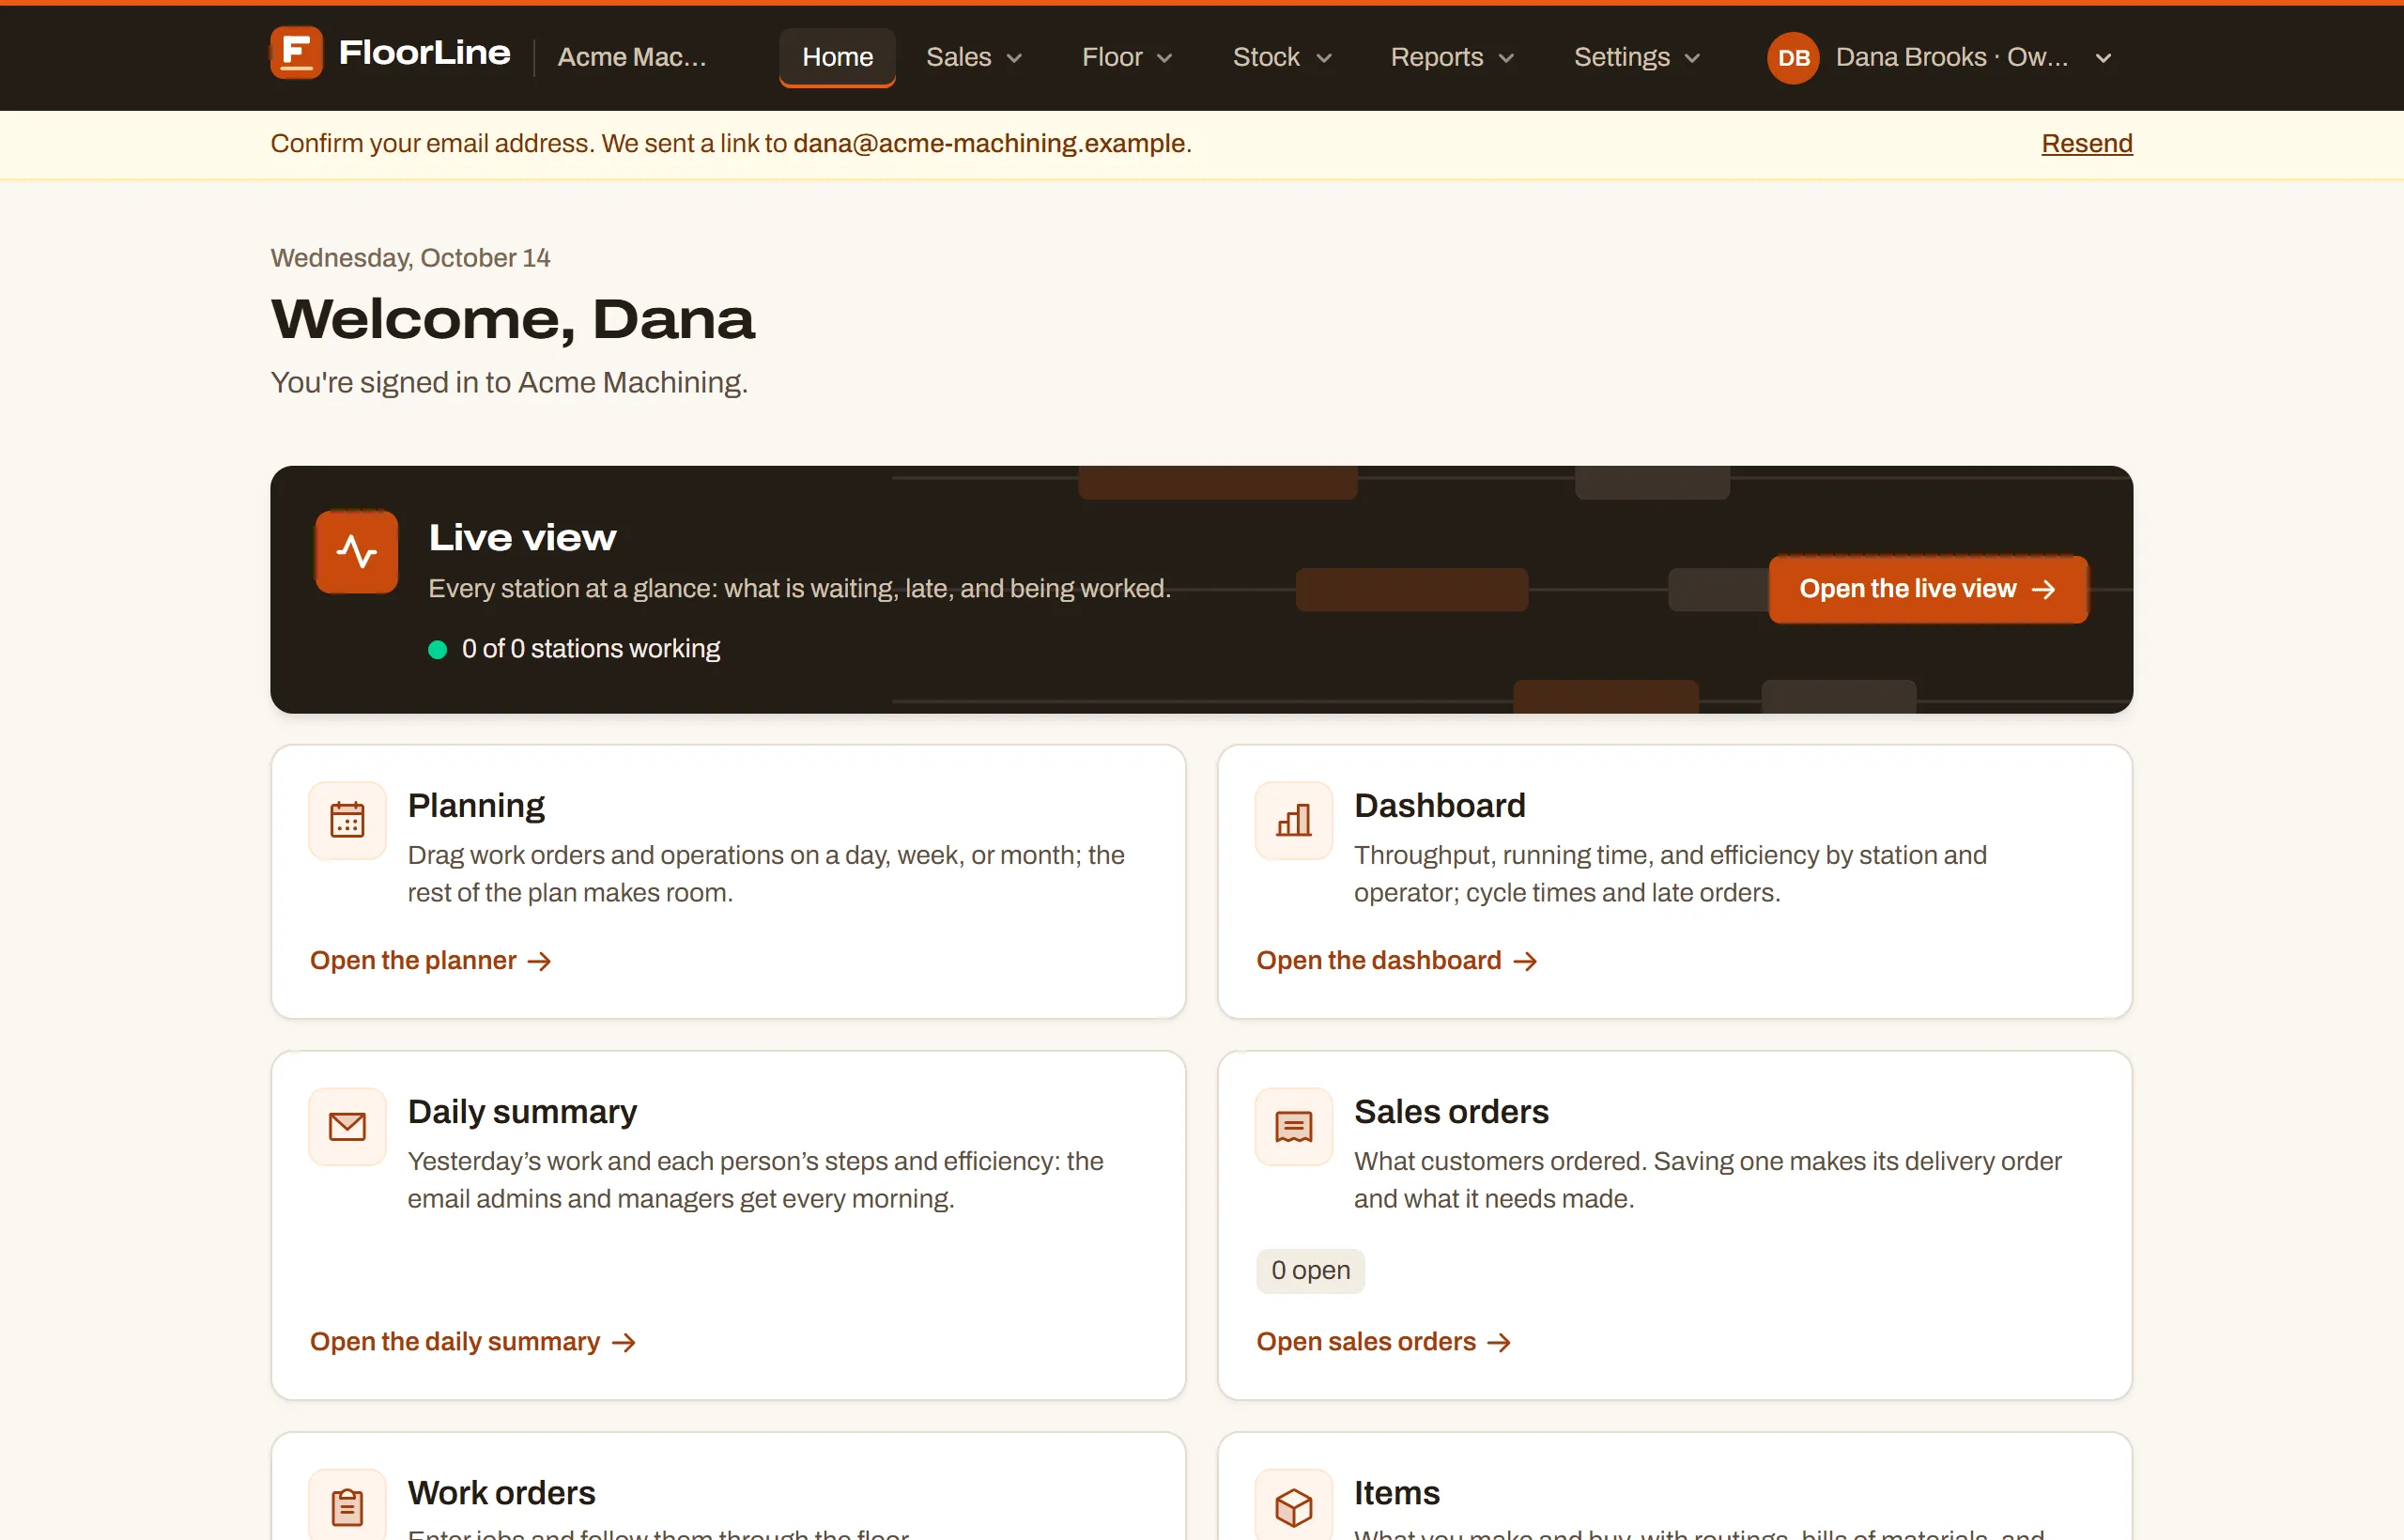
This is Home. It has a card for each part of FloorLine, with counts once you have data. The header across the top holds the menus you’ll use below. See Find your way around.
As an admin, you’ll also see Get your shop running: a checklist of the steps below (stations, people, an item with its routing, a first work order, and a tablet). Each one ticks off as you do it, with a link to where it’s done, and the checklist goes away once they’re all done. Hide this puts it away sooner. Stuck on any page? Help in the header opens the article for that page.
3. Set your time zone and hours
Section titled “3. Set your time zone and hours”FloorLine uses your shop’s time zone for dates and reports, and the planning calendar schedules work only during your hours.
-
Go to Settings → Shop settings.
-
Under Hours of operation, pick your Time zone. If your computer is in the shop’s time zone, select Use this computer’s to fill it in.
-
For each day, tick Open and set From and To, or leave it unticked for a closed day. New shops start at Monday to Friday, 8 to 5.
-
Select Save settings.
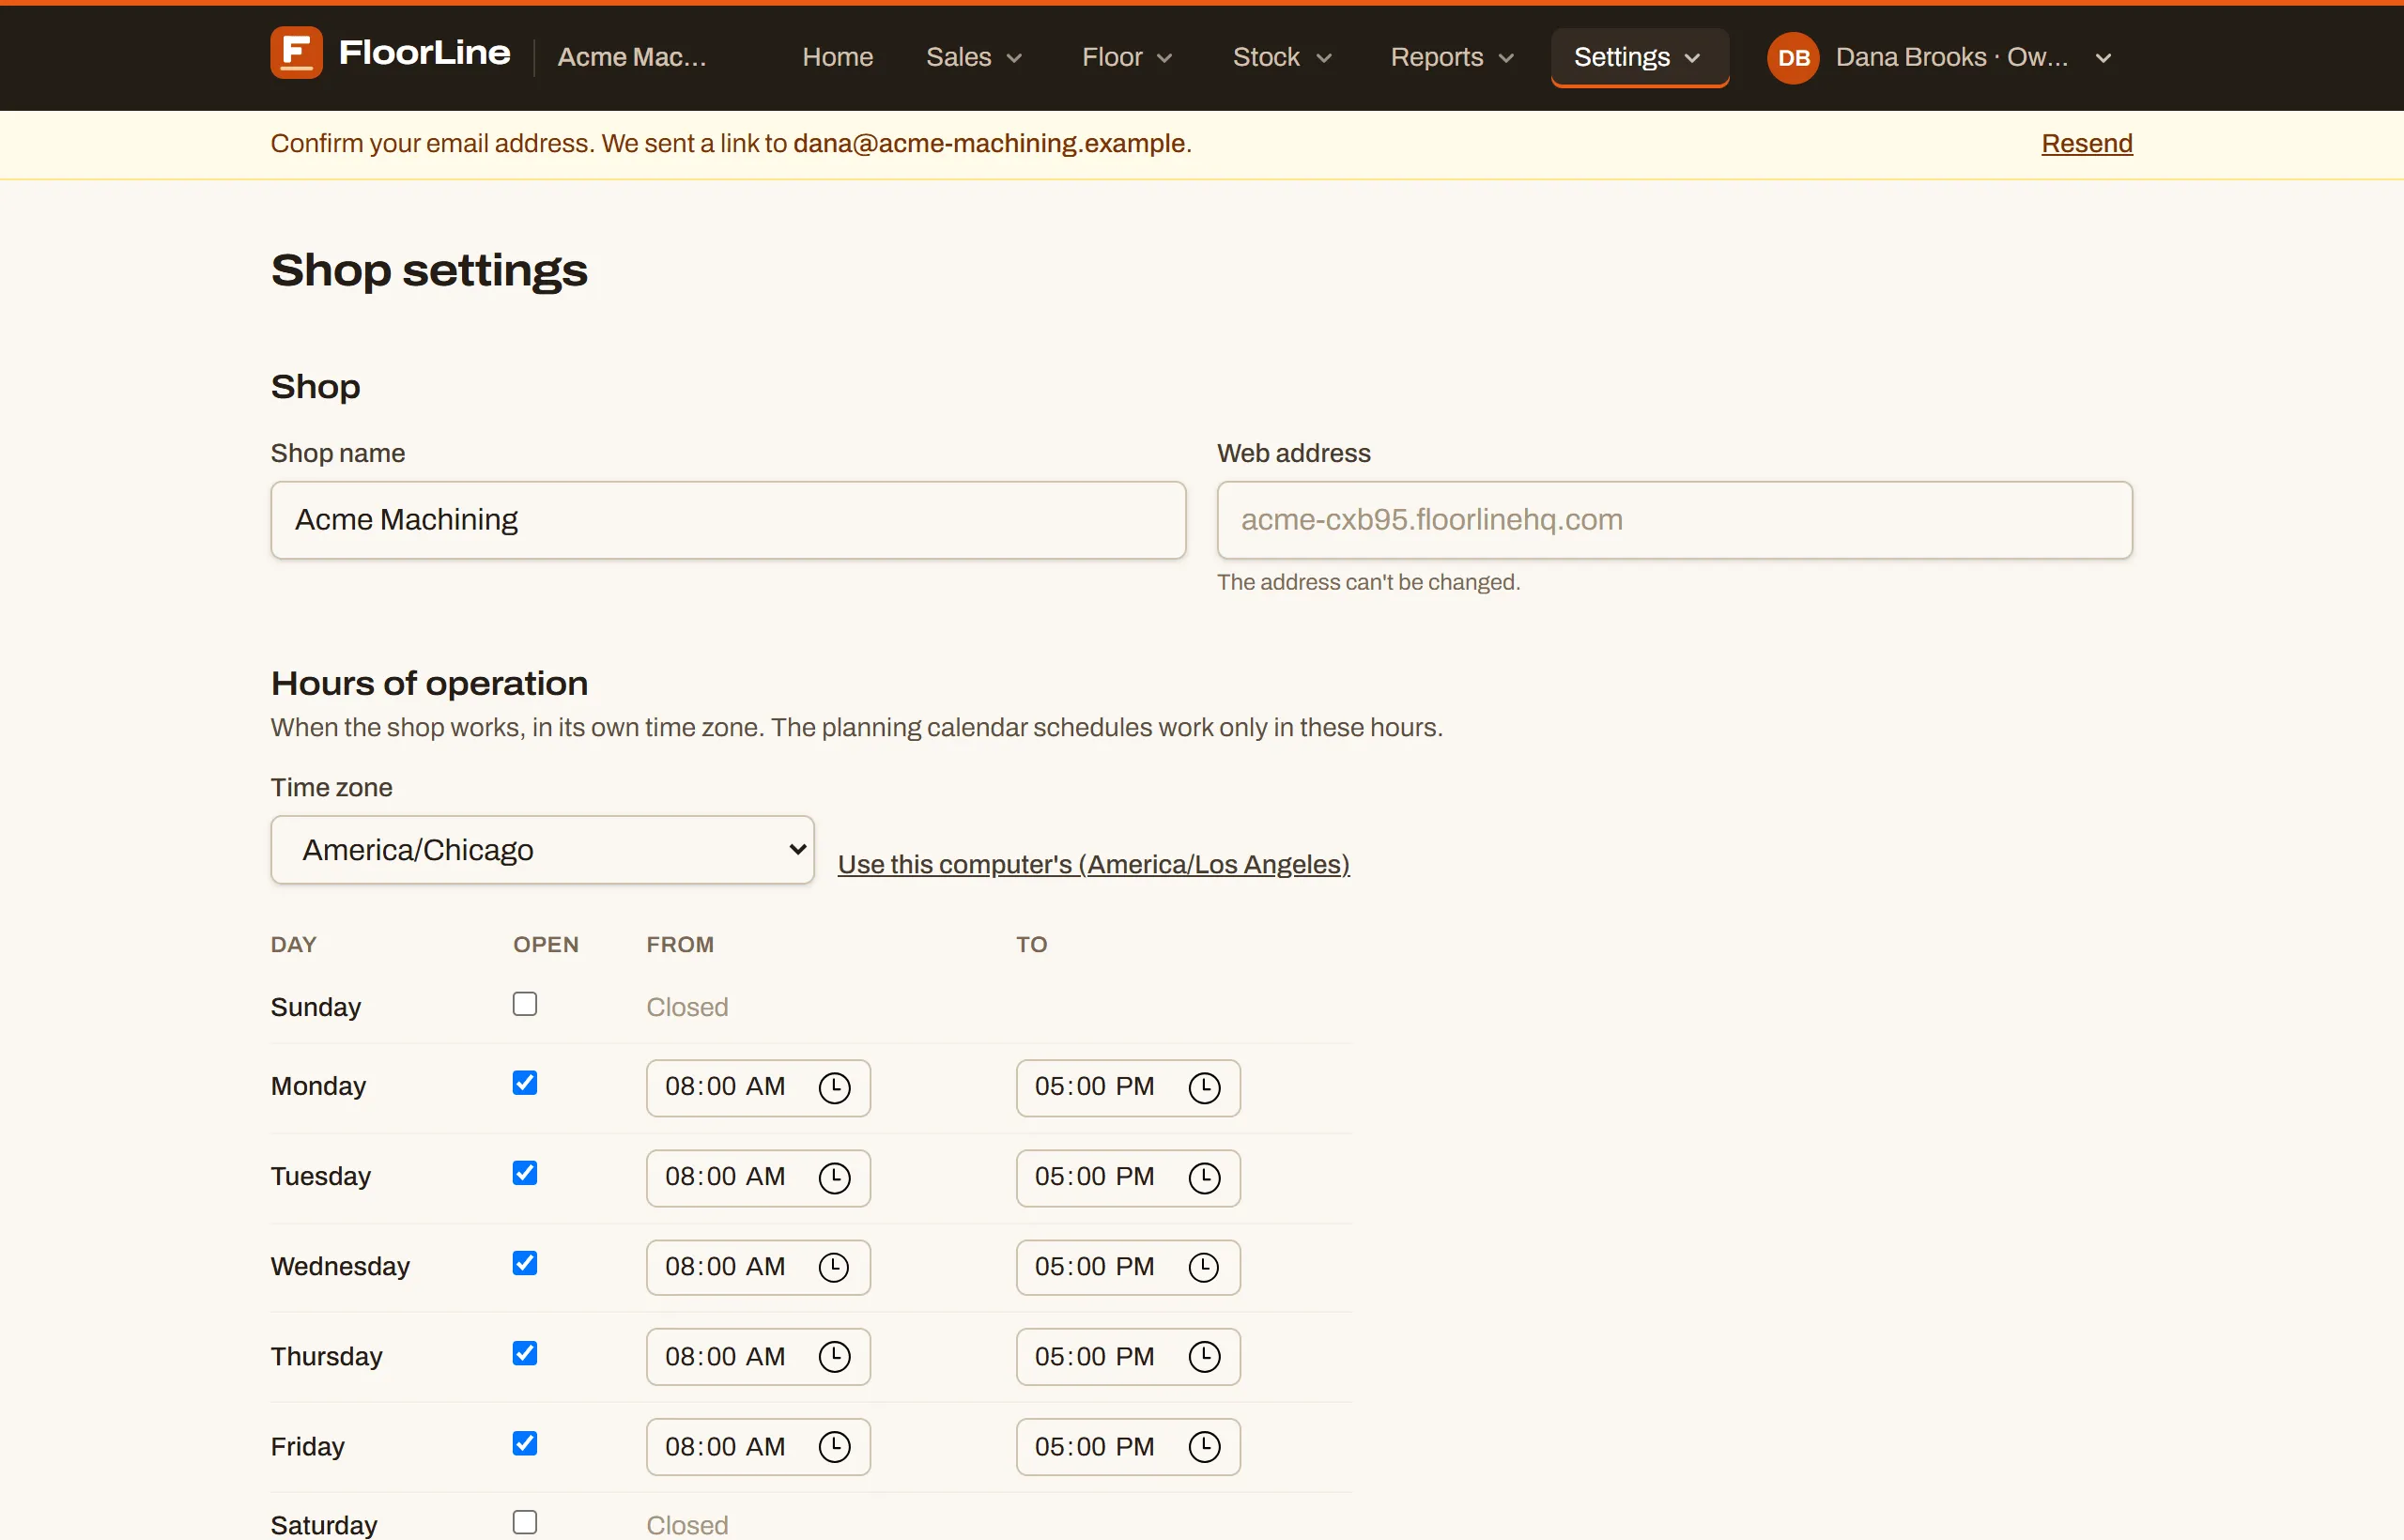
Time zone and hours are part of planning, which is Mid and up; your trial includes it. More in Shop settings.
4. Add your stations
Section titled “4. Add your stations”Stations are the places work happens, in the order jobs usually move through them. For this walk-through, add two: say Lathe and Deburr.
-
Go to Settings → Stations.
-
Type the first station’s name in New station and select Add station.

-
Add the second station the same way.
-
If they’re in the wrong order, use the arrows on a station’s row to move it earlier or later.
The page shows how many of your plan’s stations you’re using. Each station can have one tablet, which comes with it. See Set up stations.
5. Add an operator
Section titled “5. Add an operator”Operators sign in on the tablet by tapping their name and entering a PIN. They don’t need an email address.
-
Go to Settings → Users.
-
Select Add operator.
-
Enter their Name and a PIN (4 to 6 digits). Operators tap their name on the tablet, so if two people share a first name, add a last initial.
-
Select Save operator.
-
Tell the operator their PIN yourself. FloorLine doesn’t send it anywhere.
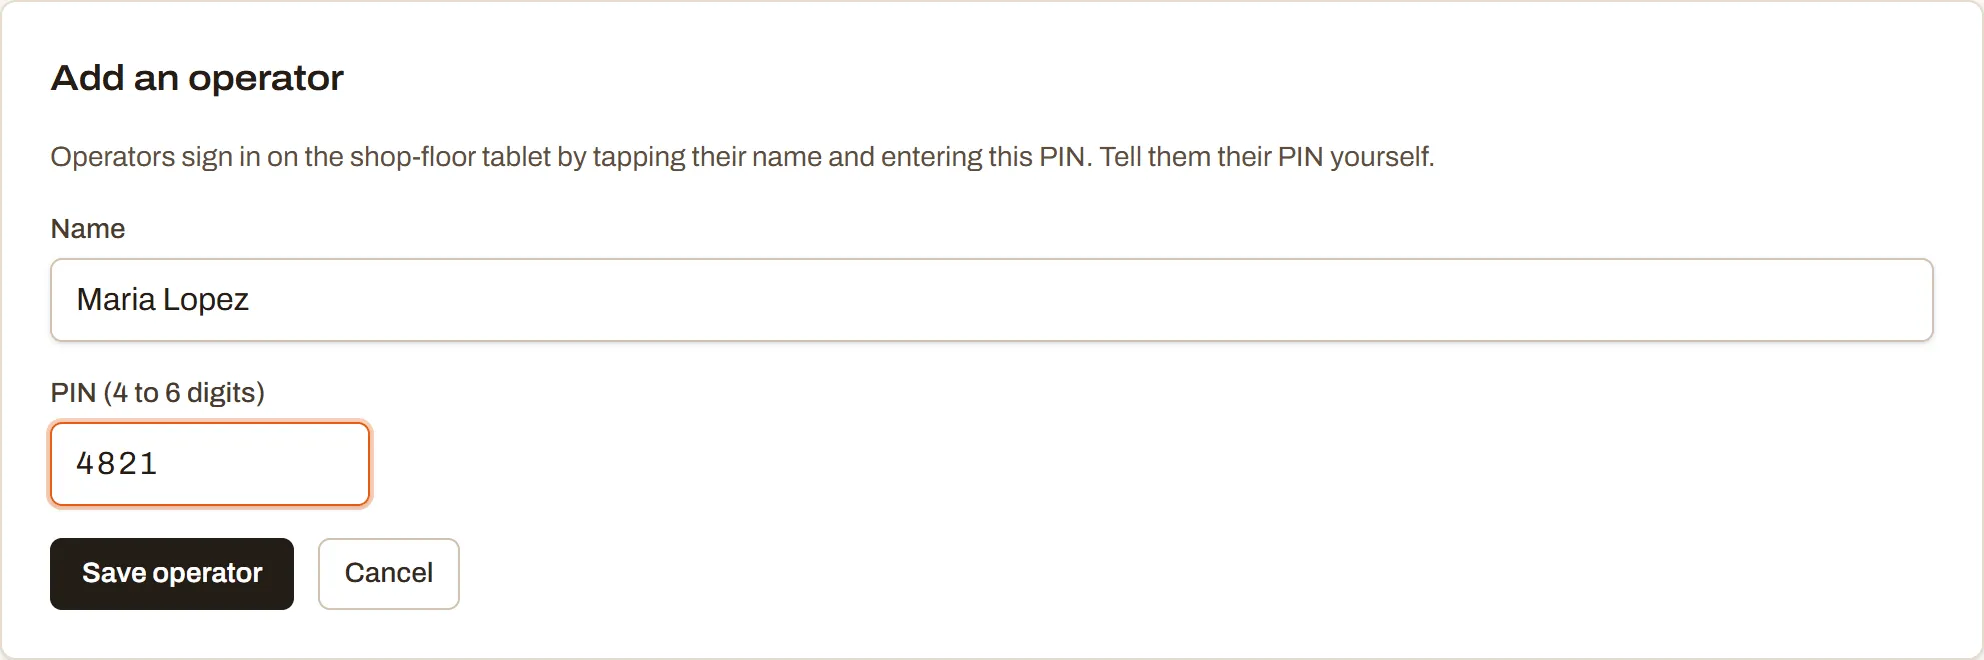
To bring in admins and managers, use Invite admin or manager on the same page; they get an email to set their own password. See Users and roles.
6. Make an item with a routing
Section titled “6. Make an item with a routing”An item’s routing is the list of stations it goes through. Every work order for the item follows it.
-
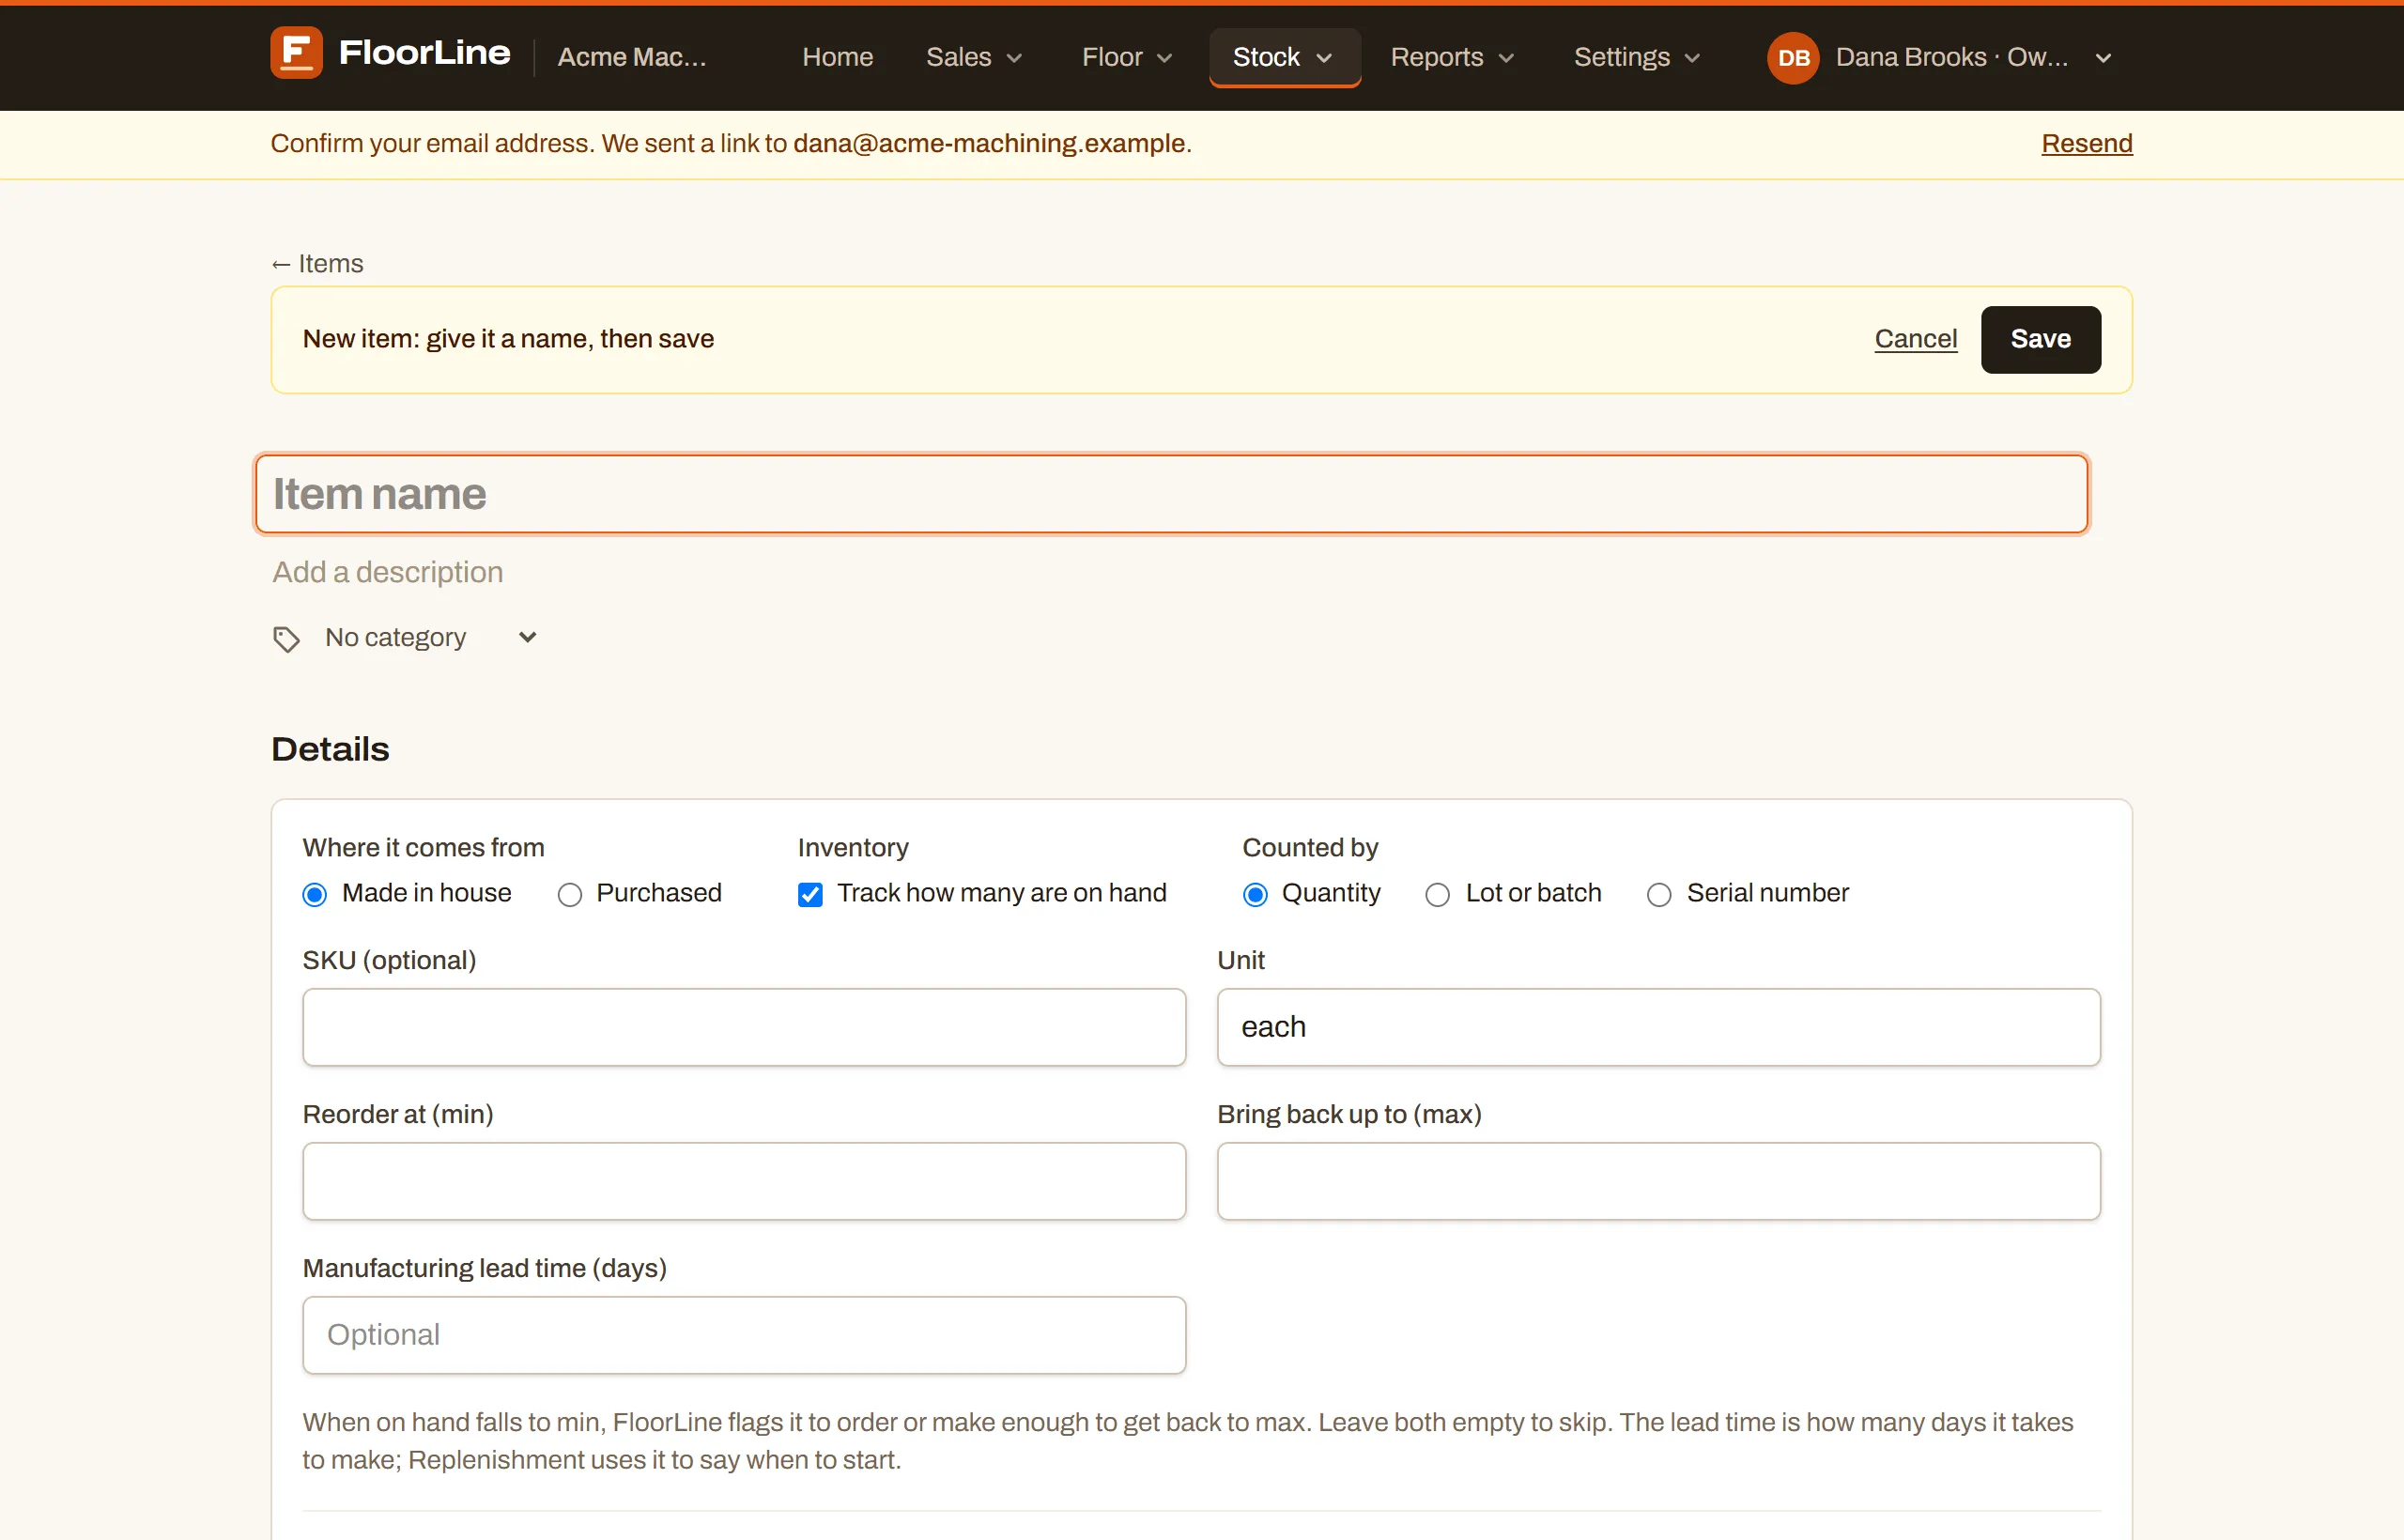
Go to Stock → Items and select Add item.
-
Type the item’s name where it says Item name, like “Shaft coupler, 1 in”. Leave Where it comes from on Made in house.
-
Scroll to Routing and select + Add new line. Type a station, Lathe, and pick it from the list.
-
Select Add the operation on that line. In the dialog, type what happens there under Operation, like “Turn to size”, and select Done.
-
Select + Add line and add the second step the same way: Deburr, “Break edges”.
-
Select Save at the top of the page.
On your trial you’ll also see sections for stock, the bill of materials, and more. You can leave them for now. See Set up items and Routings.
7. Create a work order
Section titled “7. Create a work order”-
Go to Floor → Work orders and select New work order.
-
Pick your item under Item to make. The form shows the stations it goes through.
-
Enter a Quantity. The rest is optional: Due date, Customer, Customer PO, and Notes.
-
Select Create work order.
FloorLine opens the new order, WO-1001. On Mid and up, the form also shows when the order is expected to be done, worked out from everything already on the floor.
8. Print the traveler
Section titled “8. Print the traveler”A traveler is the paper that goes with the job. On the work order’s page, select Download traveler and print the PDF.
It has a barcode for the order (WO-1001) and one for each step (WO-1001-1, WO-1001-2), plus the routing, the materials, and lines for who started and finished each step. Operators can scan these barcodes with the tablet’s camera. See Work orders.
9. Set up a tablet at the first station
Section titled “9. Set up a tablet at the first station”The job’s first step is at the Lathe, so that’s where it shows up first. Turn your tablet into the Lathe’s tablet.
-
On the tablet, open your shop’s address (like
acme.floorlinehq.com) in the browser and sign in with your email and password. -
Go to Settings → Tablets and select Set up this device as a floor tablet.
-
Pick the Station (Lathe). The Tablet name fills in as “Lathe tablet”; change it if you like.
-
Select Start floor mode.
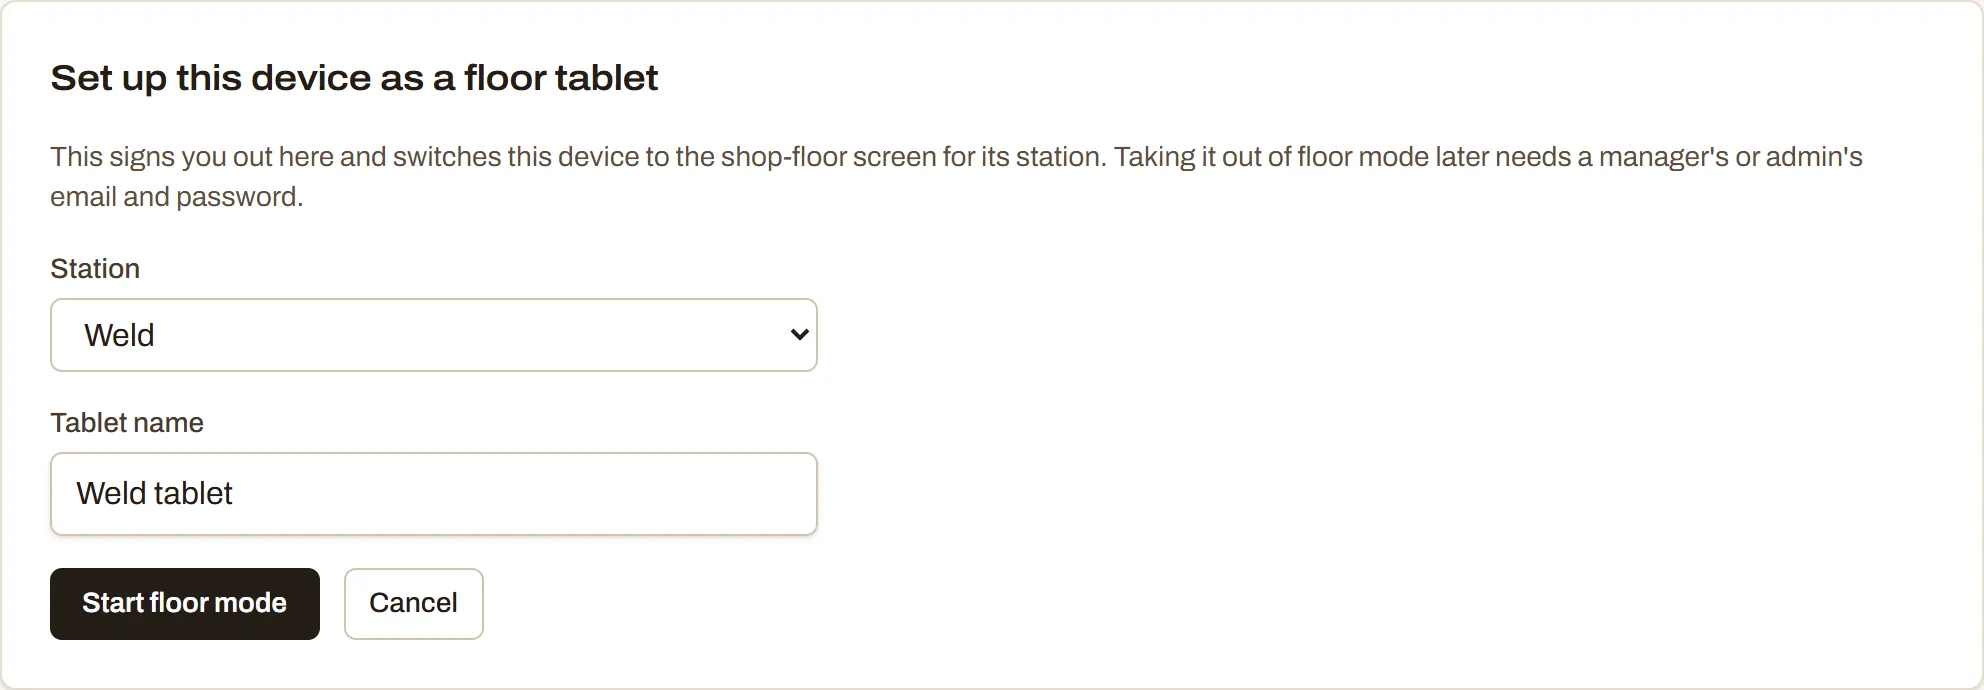
This signs you out on that device and switches it to the floor screen for its station. From now on it stays a floor tablet. Taking it out of floor mode needs a manager’s or admin’s email and password. See Set up tablets.
10. Sign in with the PIN
Section titled “10. Sign in with the PIN”-
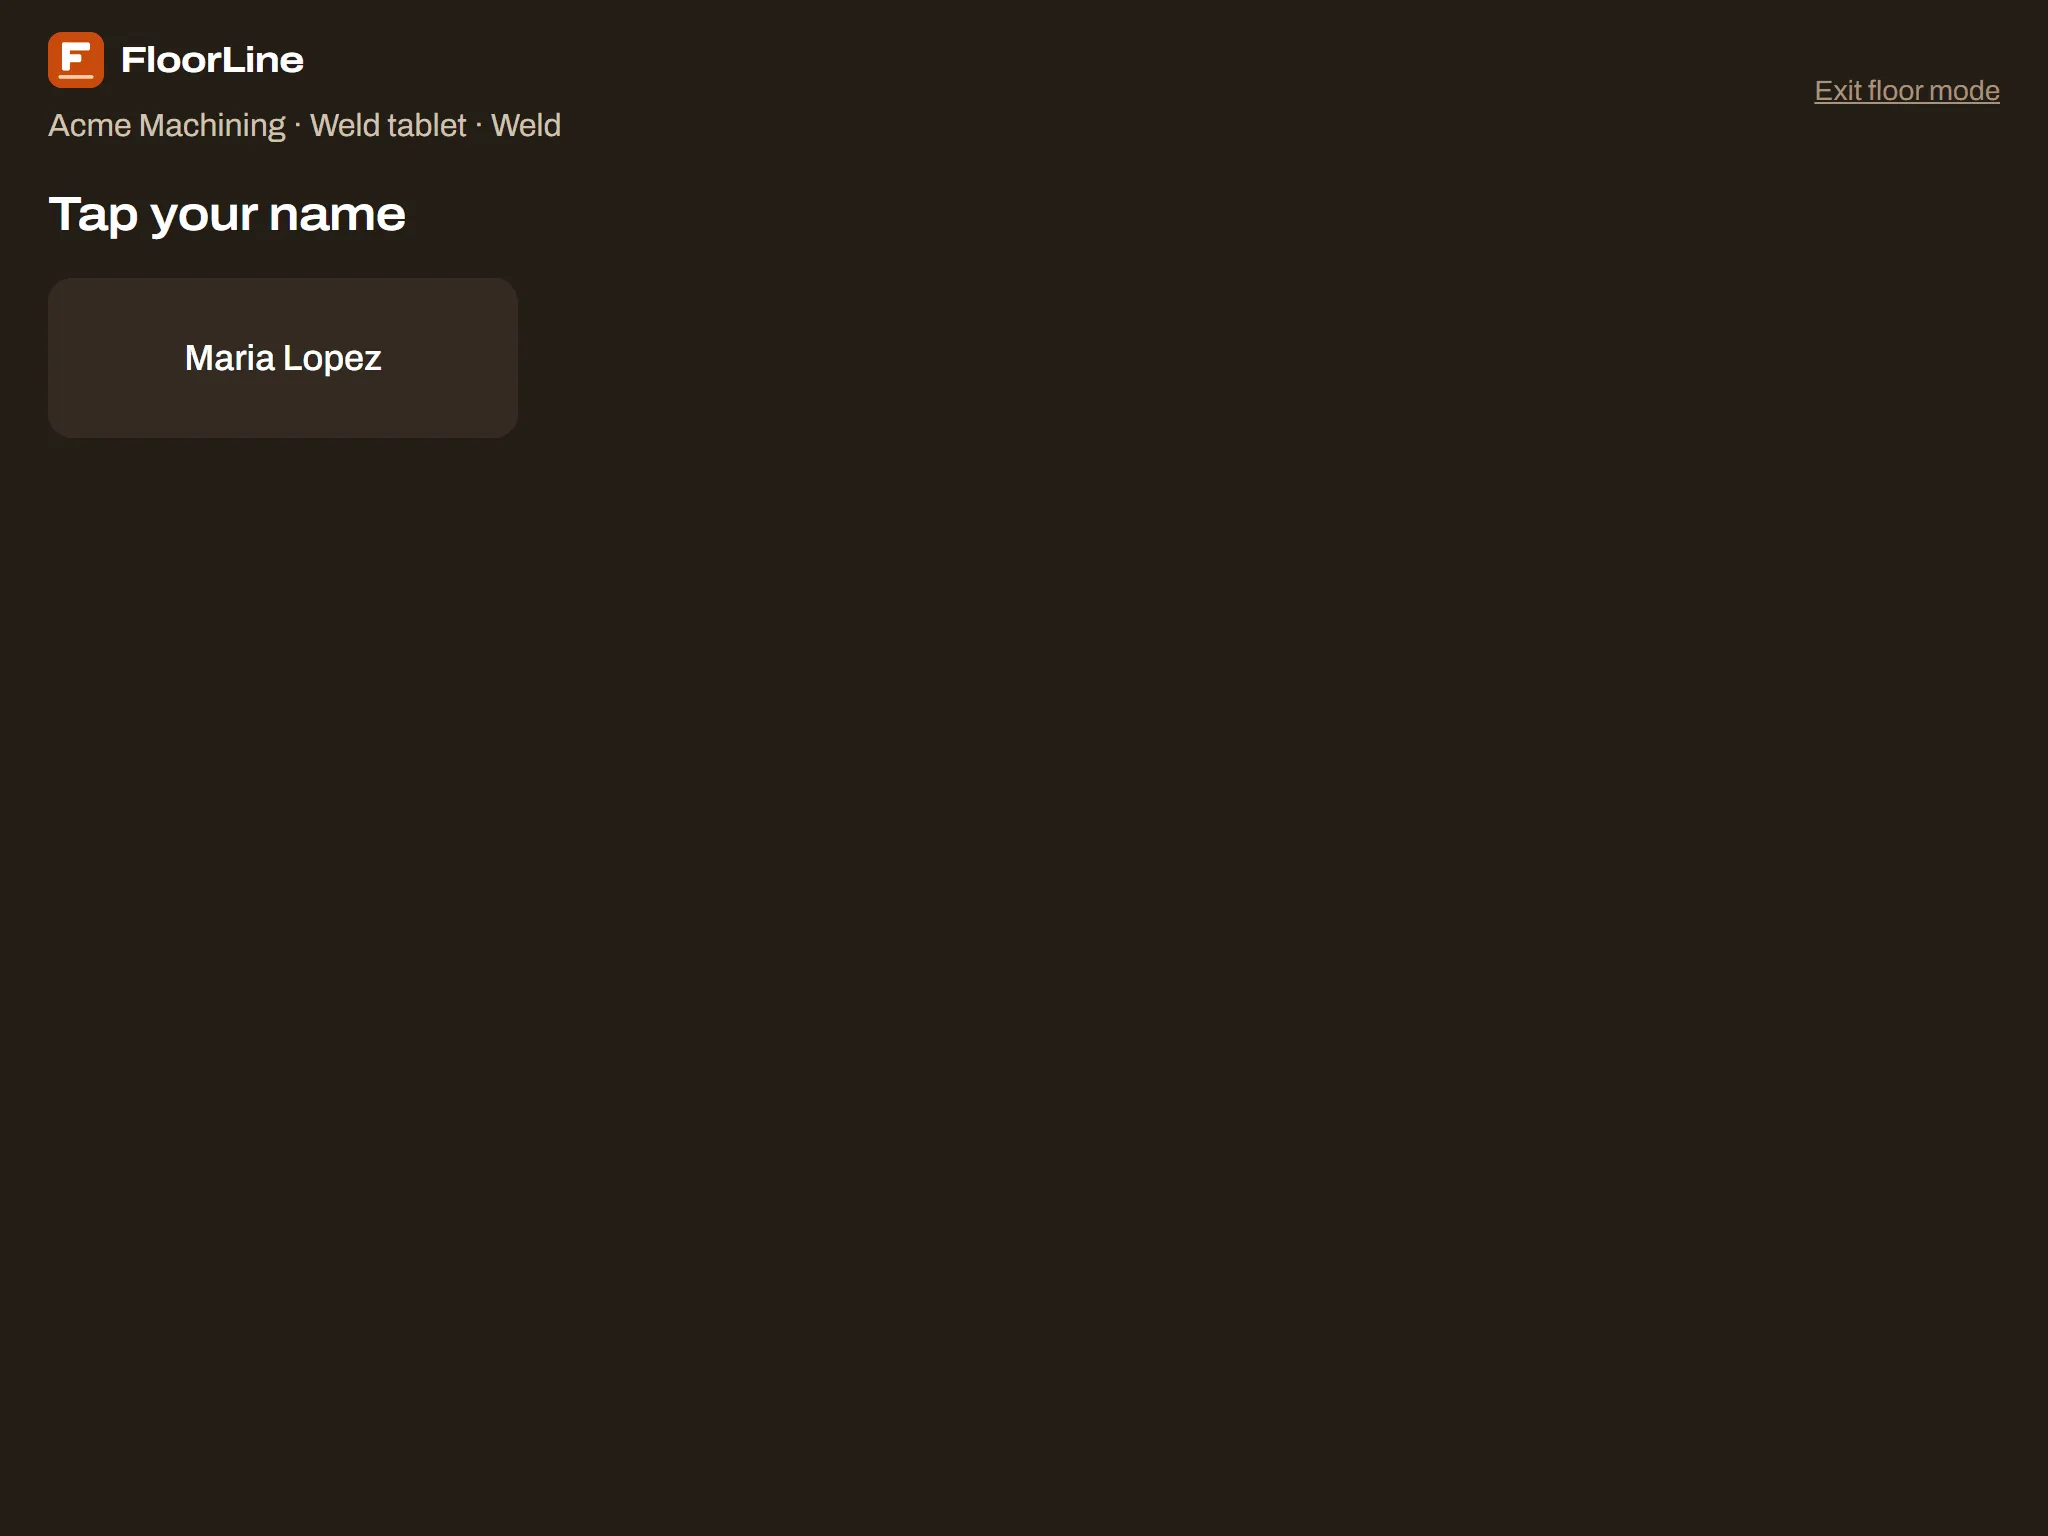
On the floor screen, under Tap your name, tap your operator’s name.
-
Enter the PIN and tap the arrow to sign in.
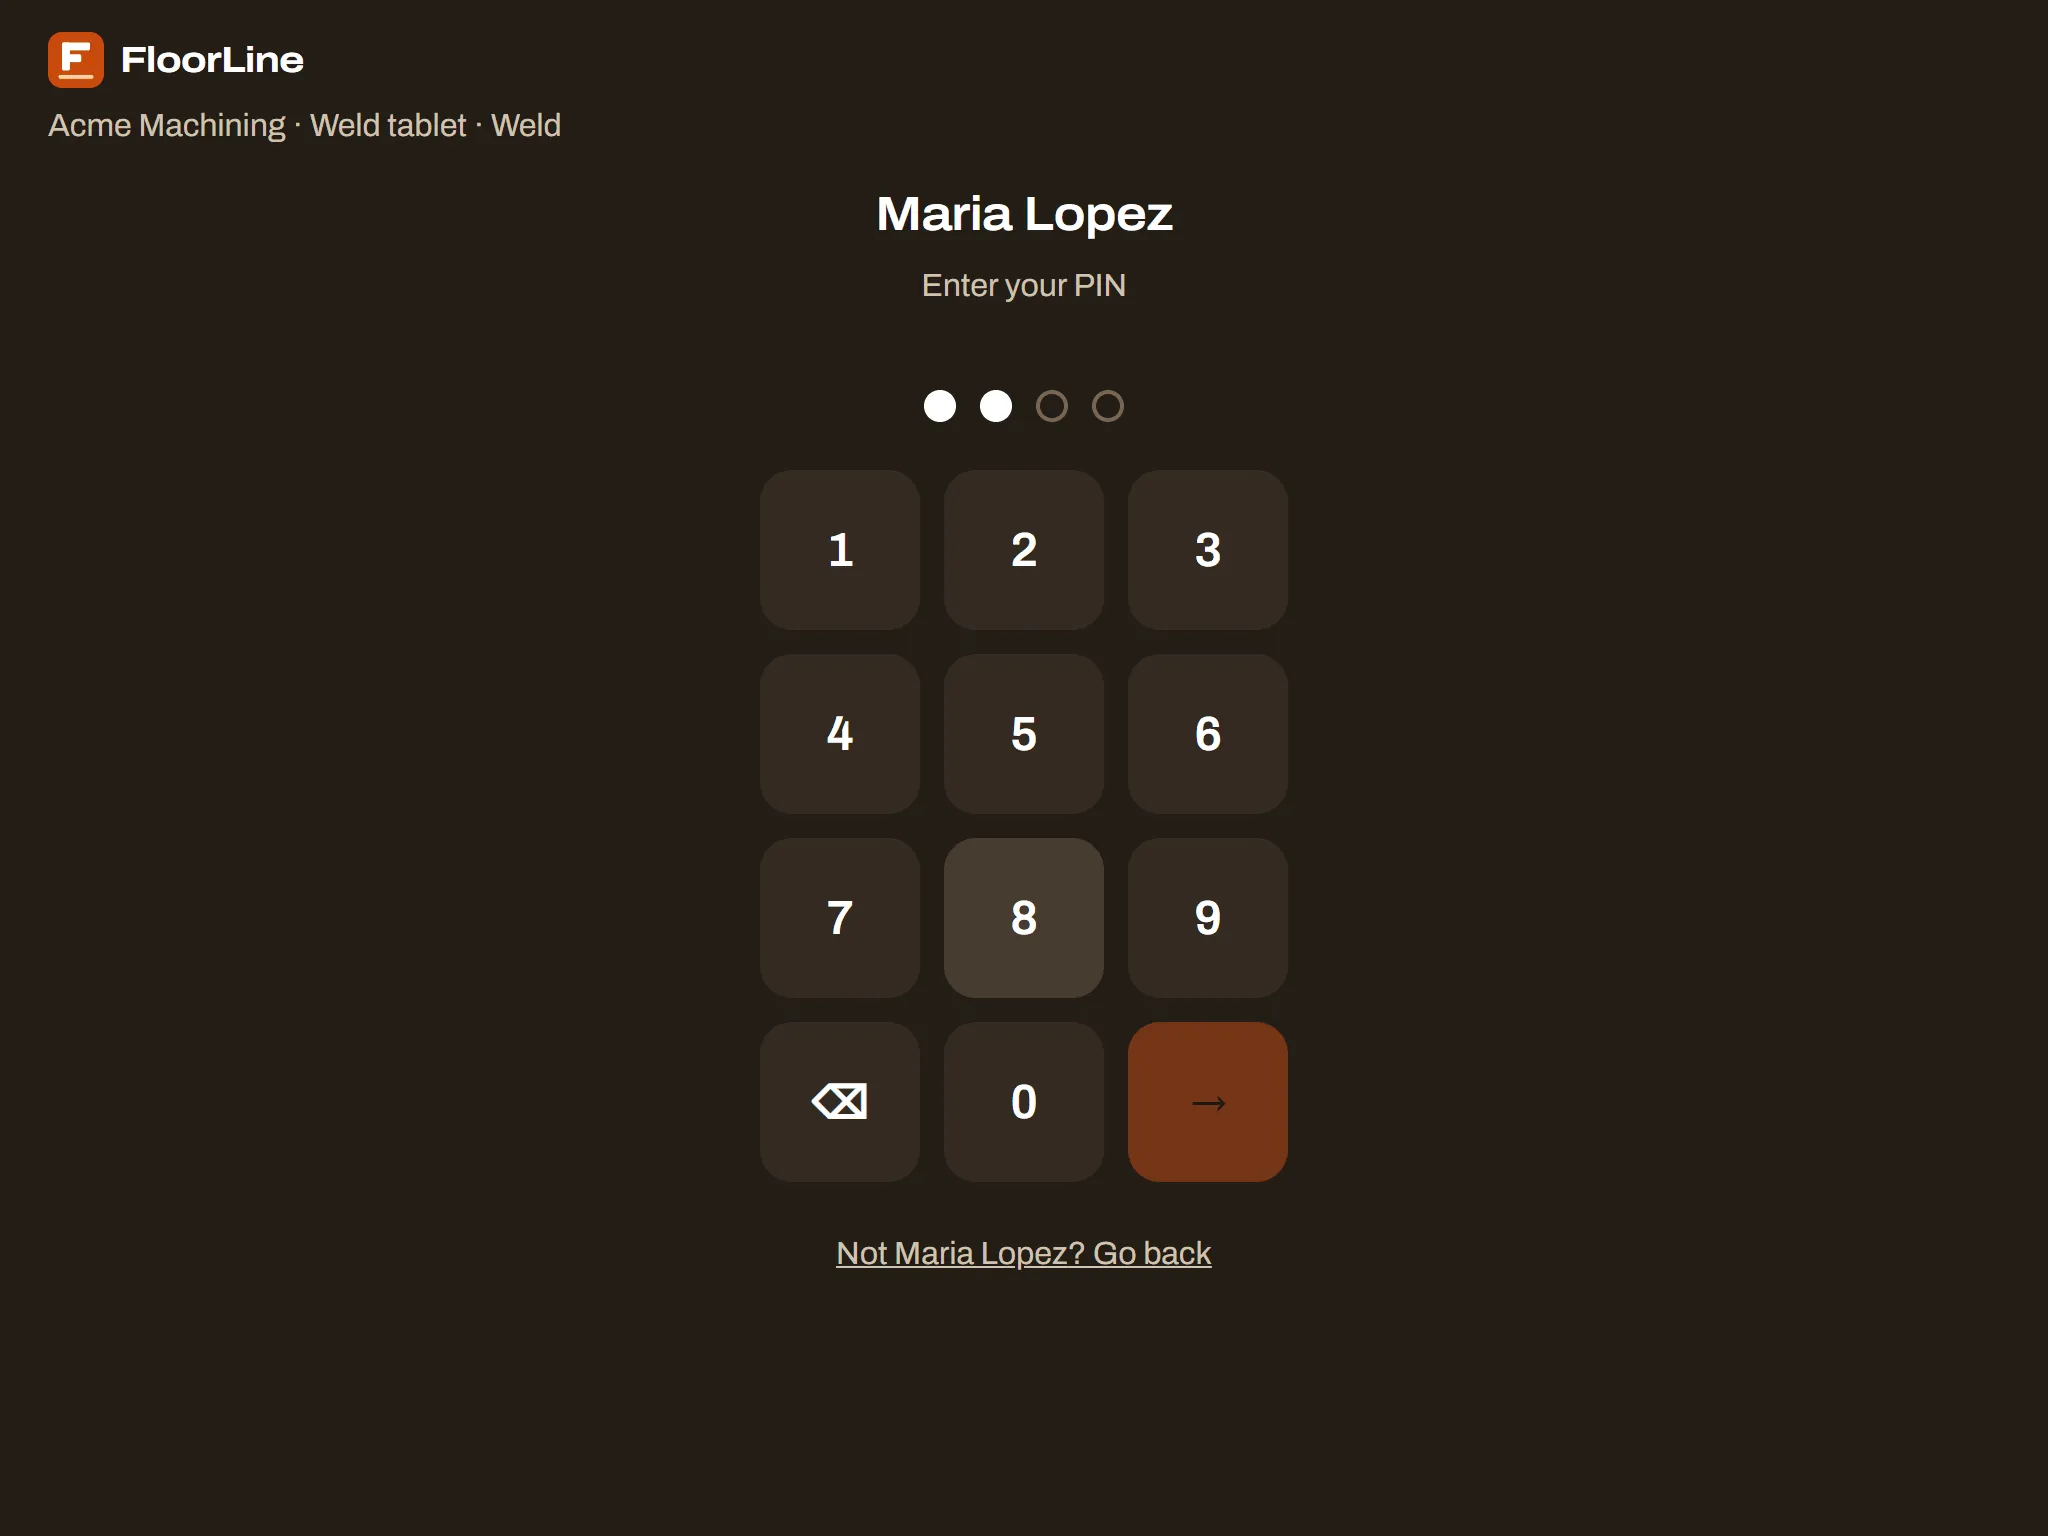
Five wrong PINs in a row lock that person out of the tablets for 15 minutes; an admin can unlock them sooner on the Users page.
11. Start and finish a step
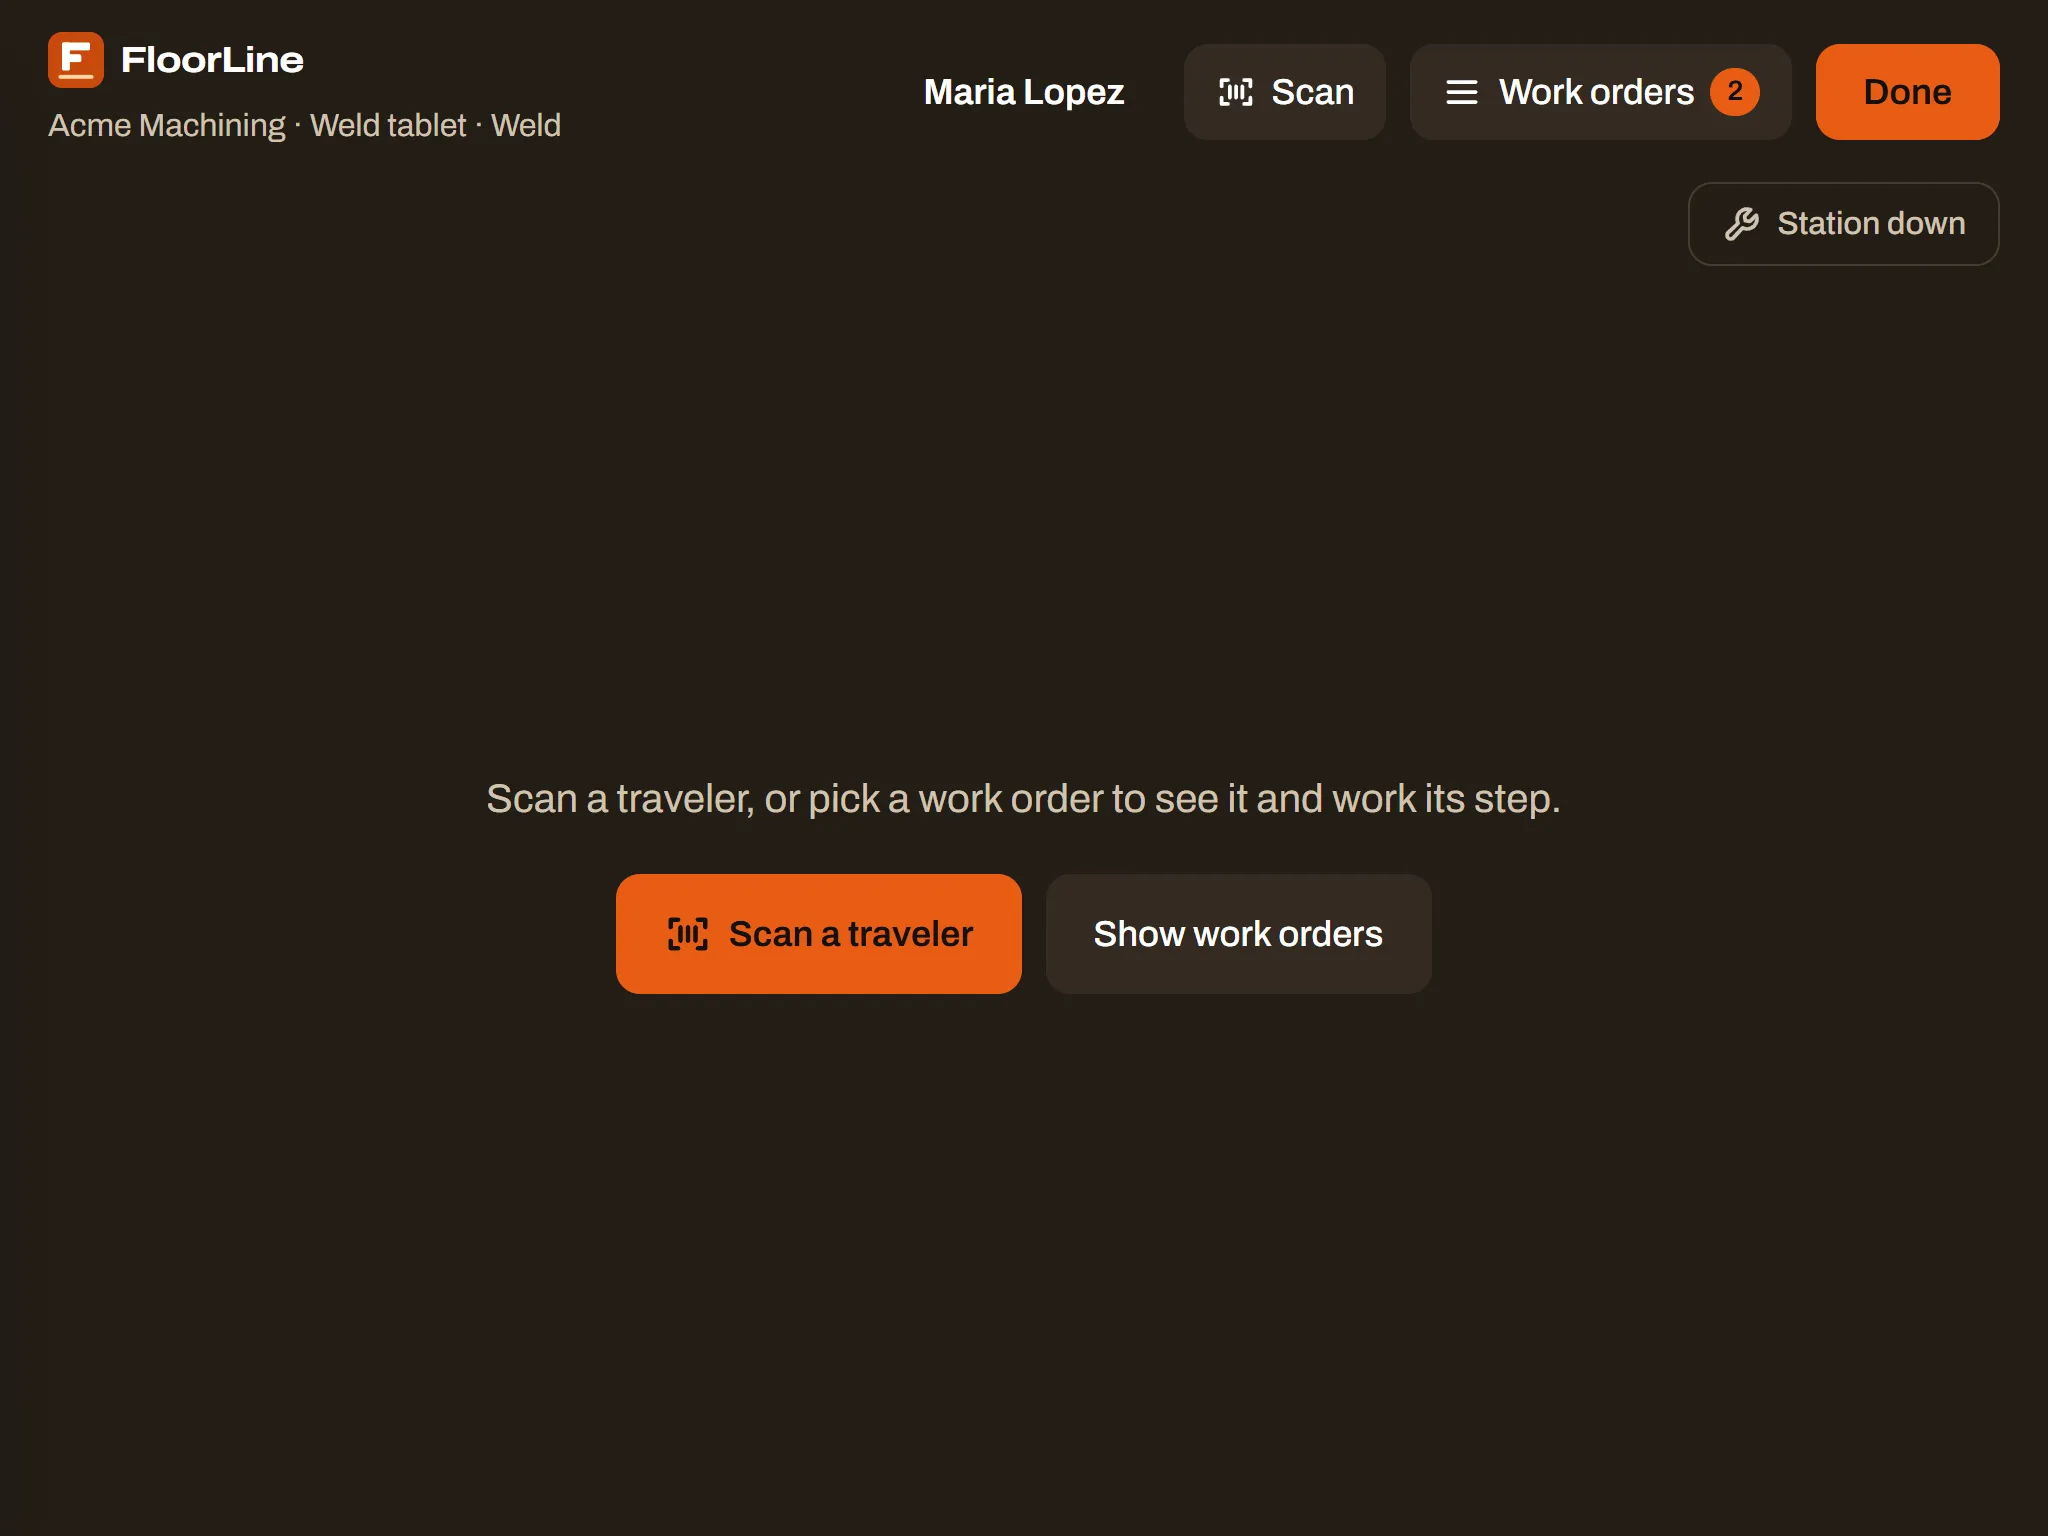
Section titled “11. Start and finish a step”Signed in, the operator sees their name at the top, with Scan, Work orders, and Done.
-
Tap Work orders (or Show work orders) and pick WO-1001. Or tap Scan a traveler and point the camera at the printed traveler’s barcode.
-
Tap Start. The step is now running, and the order is in progress.
-
When the work is done, tap Complete step.
-
Tap Done to sign out.
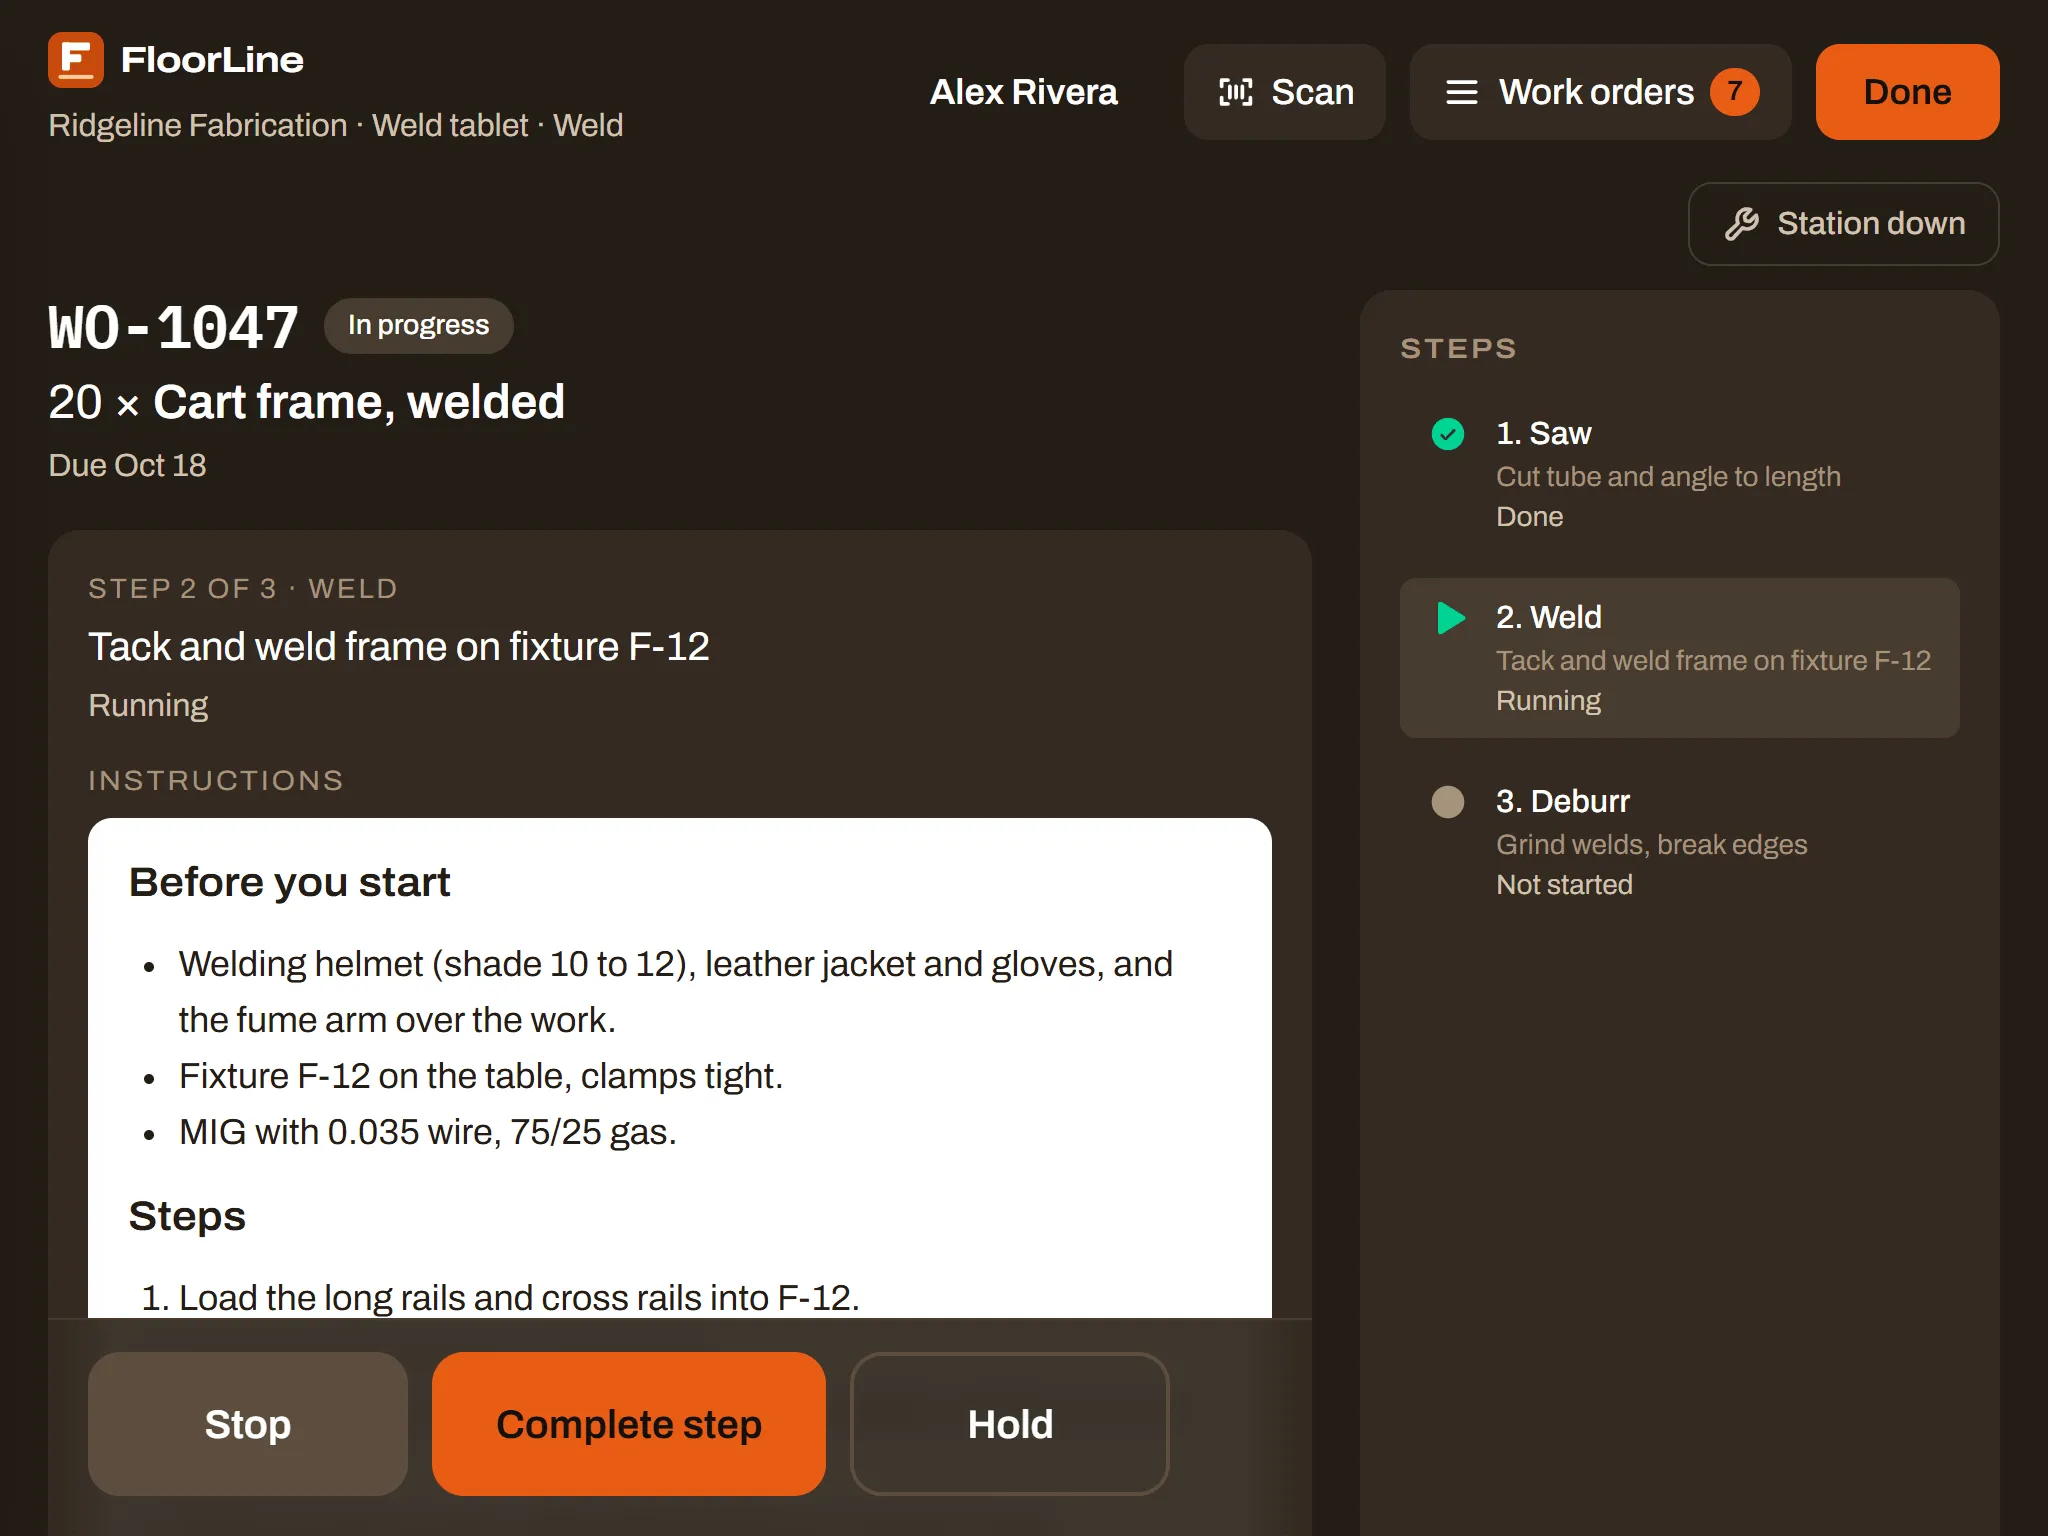
The job leaves the Lathe’s list and moves to Deburr. Set up a tablet there the same way, or finish the order from its page in the office with Mark complete.
If the tablet sits idle, it signs the operator out after a minute and goes back to the names. See Use the tablet.
12. Watch it on Live view
Section titled “12. Watch it on Live view”On your computer, go to Floor → Live view. There’s a card for each station. While a step runs, its job shows on that station’s card with the operator’s name. When a step is completed, its job card shows Completed, flashes green, and fades, and the job turns up as available at the next station.
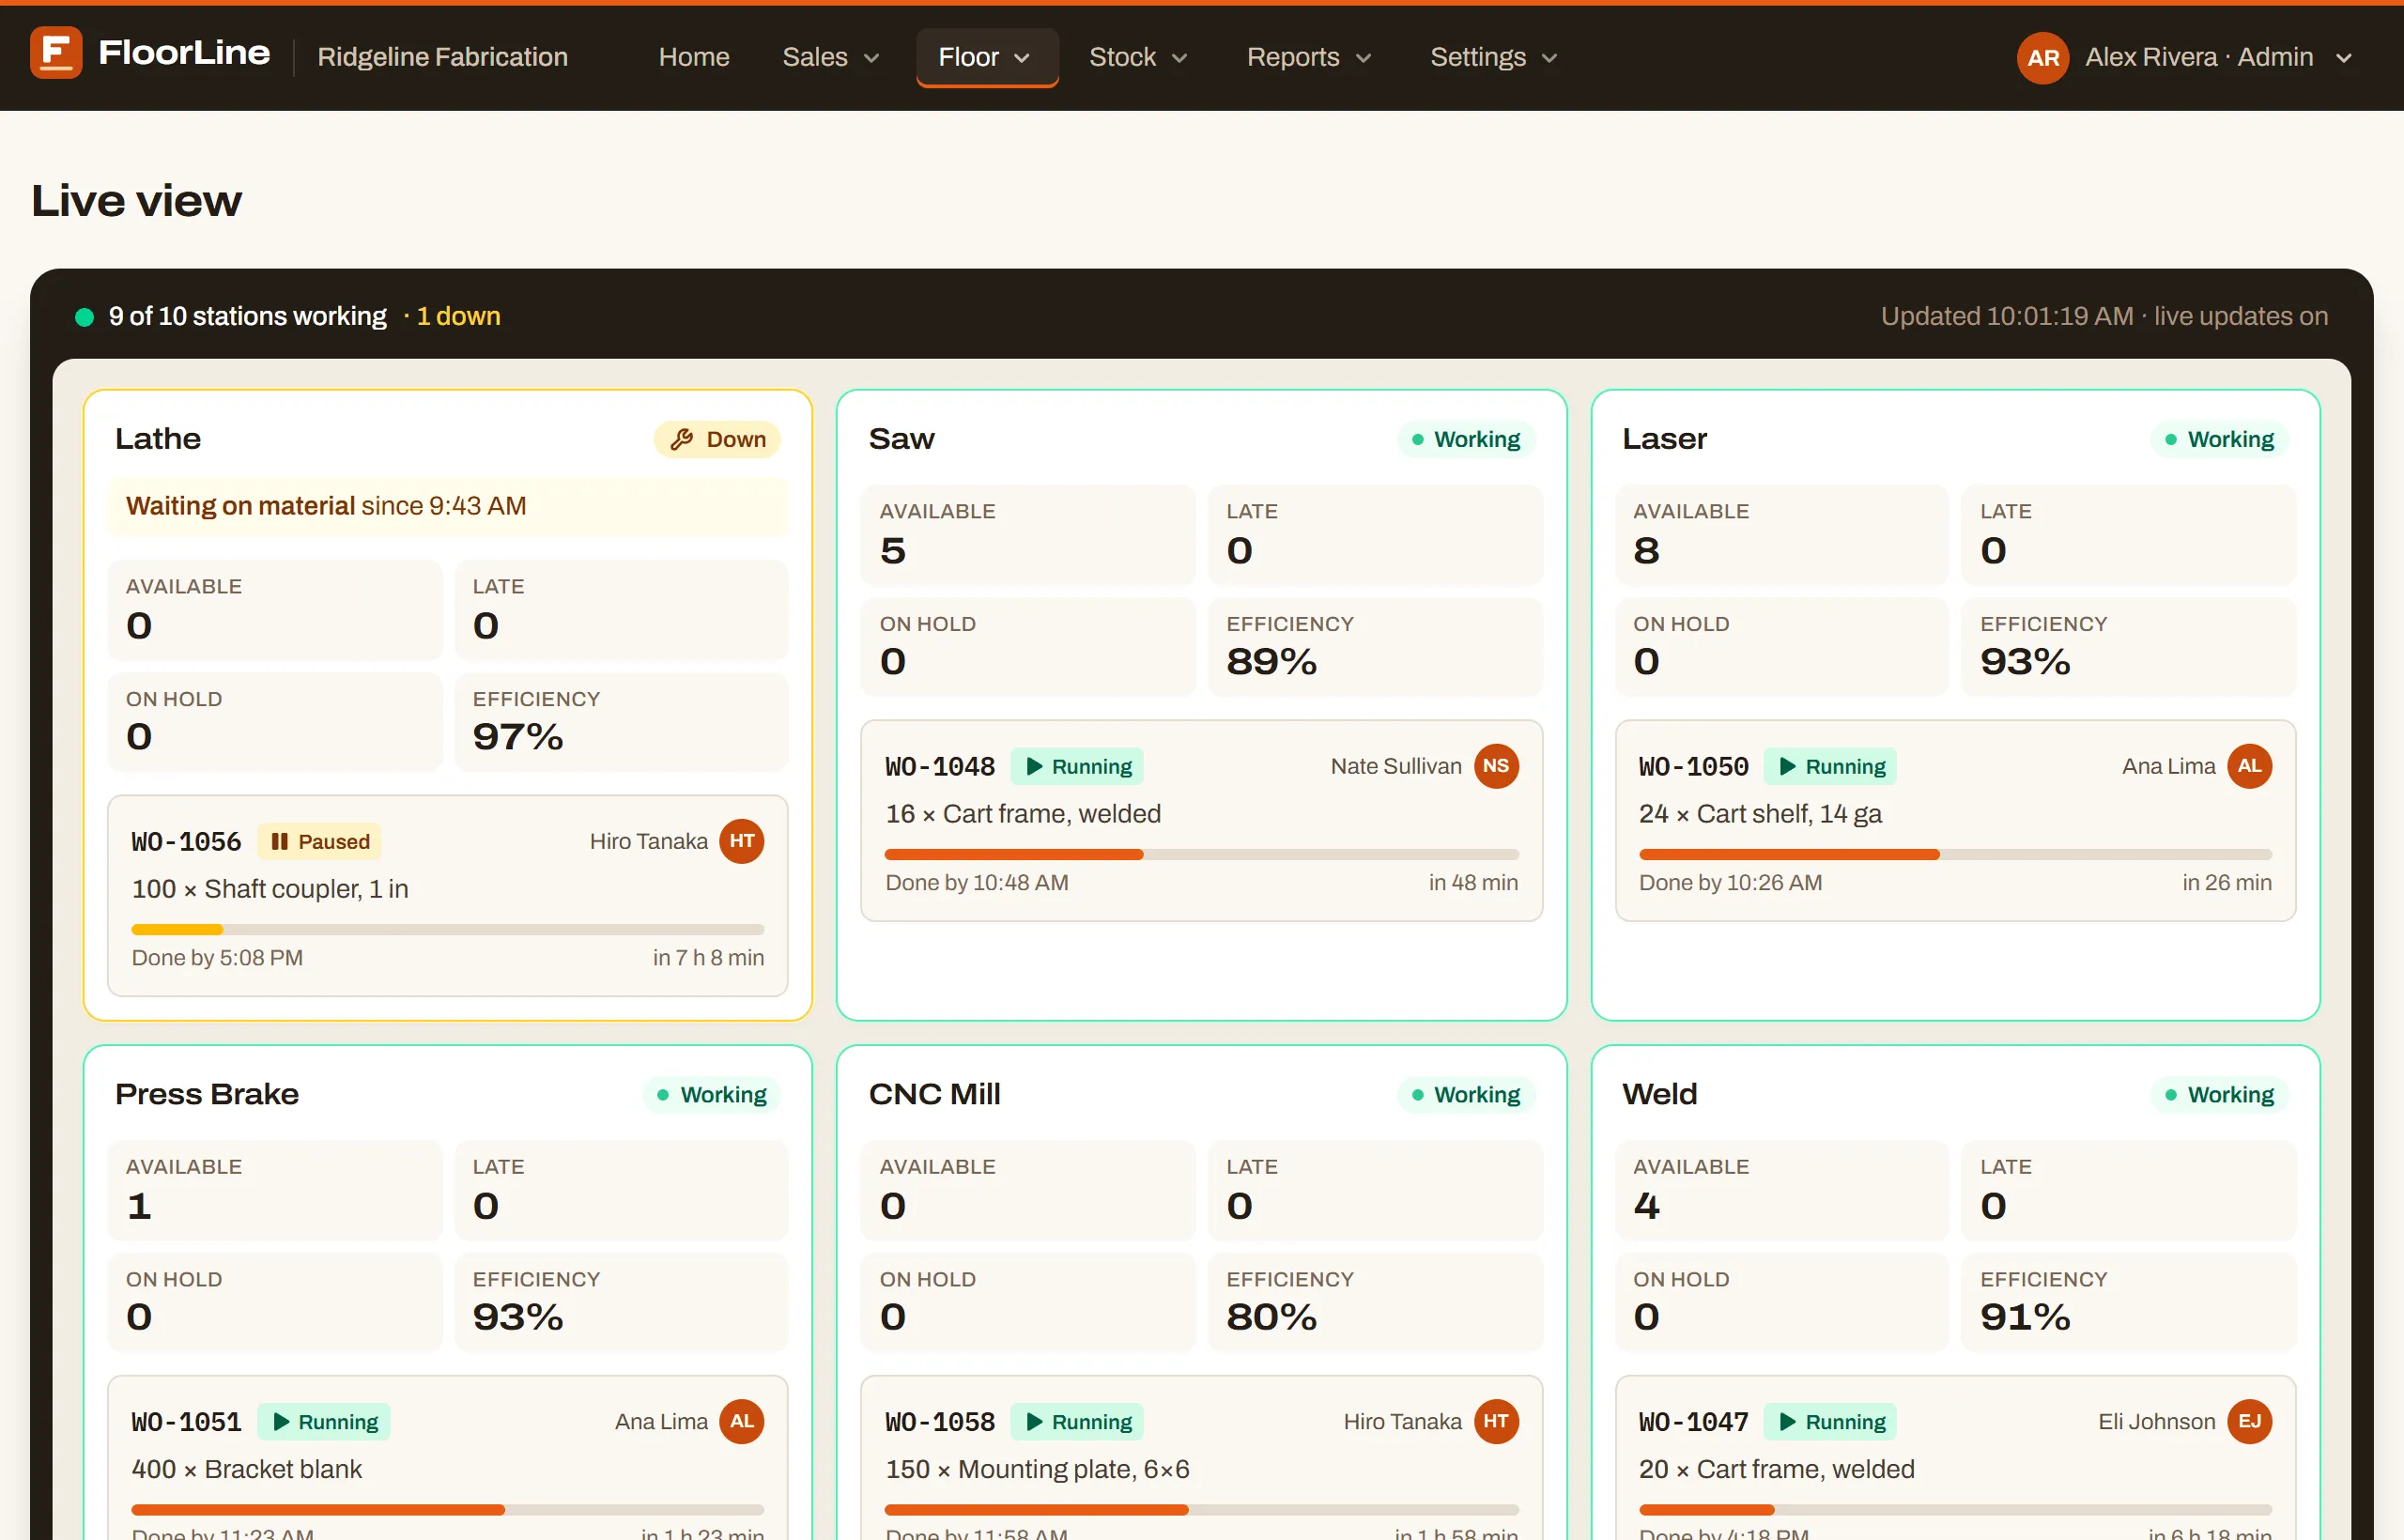
Live view updates by itself as people tap on the tablets. See Live view.
What’s next
Section titled “What’s next”You have the whole loop working. From here:
- Add the rest of your shop. Add your other stations, people, and items. If you have a lot of data in spreadsheets already, import it: stations, items, routings, bills of materials, vendors and customers, lots, and open work orders, each from a template (Mid and up, so it’s included in your trial).
- Turn on stock. Give items a bill of materials and min and max, and stock moves as jobs do. See How stock moves.
- Pick a plan. Before the trial ends, the owner chooses a plan under Settings → Billing. See Billing.